☑︎ This review has been last updated in May 2026
Looking for a creepily fast VPN 🦇 that lets you vanish from trackers and haunt Netflix libraries — all without cursing your wallet?
CyberGhost sure makes a lot of promises.
From a massive server network to special “NoSpy” features and streaming-optimized servers, it paints a pretty picture. But in 2026, when every VPN claims top speeds, military-grade encryption, and total anonymity… you’ve got to ask:
Is CyberGhost the real deal — or just a well-disguised specter of what a good VPN should be?
You’re in the right place. In this no-nonsense review, we’ll break down what CyberGhost actually offers in everyday use — the good, the meh, and the slightly overhyped.
No fluff.
Plenty of spooky puns 👻
For starters, here’s a quick overview if you’re short on time:
Alright, let’s peel back the mask and see if CyberGhost really stands up to its promises:
Privacy and Security Features
Server Network and Speeds
Streaming and Unblocking
Torrenting and P2P Use
Pricing and Refund Policy
Support and Usability
Final Verdict
User Reviews
How Is CyberGhost Different from Other VPNs?
Let’s be real: most VPNs these days claim the same basic stuff — strong encryption, thousands of servers, “no logs ever,” blah blah blah.
So what (if anything) makes CyberGhost stand out from the ghostly crowd?
Below are a few actual differences that aren’t just marketing noise:
- Dedicated servers for streaming and torrenting: CyberGhost doesn’t just say “we work with Netflix” — they actually label specific servers for unblocking Netflix, Hulu, BBC iPlayer, and others.
- NoSpy servers: located in a privately operated Romanian data center, these are extra-secure, fully managed by CyberGhost staff only — useful if you’re extra-paranoid (we don’t judge).
- 45-day money-back guarantee: the longest refund window we’ve seen in the VPN space, giving you ample time to decide if it’s right for you.
- Smart Rules: an automation feature that lets you auto-launch apps or connect to certain servers under custom conditions. Surprisingly handy for power users.
- Dedicated IP (optional): lets you pay extra to get a VPN IP address that’s yours and only yours — useful for accessing sensitive services that don’t like shared IPs.
Most VPNs want to sound secure and fast. CyberGhost goes a step further and adds some useful quality-of-life features for people who use VPNs daily — not just when traveling or torrenting.
That said, how safe is it really? Time to peek under the (data) hood.
Privacy and Security Features
For any VPN, this is where the rubber meets the road — or rather, where the encryption meets your data.
CyberGhost has been in the game since 2004, and they’ve built a reputation around no-logs policies and strong encryption. But let’s go beyond the buzzwords.
Here’s what you’re actually getting:
- AES-256 encryption: same cipher used by banks, militaries, and probably secret vampire councils. It’s the gold standard — fast, secure, and basically uncrackable.
- WireGuard, OpenVPN, and IKEv2 support: you can choose between protocols depending on whether you value speed, compatibility, or security. WireGuard is now the default on most platforms.
- No logs policy: CyberGhost claims they don’t track what you do, what you download, or even when you connect. They’ve also published independent transparency reports since 2011 — a good sign.
- Kill switch: automatically cuts your connection if the VPN drops, so your real IP doesn’t leak. Enabled by default (and yes, you should leave it that way).
- DNS and IP leak protection: we ran standard tests and couldn’t find any leaks while connected. So far, so good.
These are all standard features of any good VPN by now; but that’s not all. Let’s go deeper 🕳️ down the privacy rabbit hole and talk about the unique NoSpy servers:

- Fully owned & operated: Unlike regular VPN servers that are often rented from third-party data centers, NoSpy servers are located in CyberGhost’s own private facility in Romania — with no external access.
- Staff-only access: The servers are managed exclusively by CyberGhost’s internal team, minimizing exposure to third-party tampering or surveillance requests.
- Outside 14-Eyes jurisdiction: Romania is known for its strong privacy laws and is not part of the 14 Eyes intelligence-sharing alliance. Translation: fewer legal obligations to store or share your data.
- Extra performance & privacy: Because NoSpy servers aren’t shared with as many users and don’t rely on external infrastructure, they tend to be faster, more stable, and more secure.
They’re not the default — you’ll need to scroll a bit in the server list or search “NoSpy” — but if you want the most private connection possible, this is where CyberGhost earns its name.
| Standard VPN Servers | NoSpy Servers | |
|---|---|---|
| Server ownership | Third-party data centers | ☑️ Fully owned by CyberGhost |
| Physical access | External staff may have access | ☑️ CyberGhost personnel only |
| Location | Worldwide | ☑️ Romania (outside 14 Eyes) |
| Surveillance resistance | Standard legal exposure | ☑️ High (strict privacy laws) |
| Performance | Shared with more users | ☑️ Lower load, faster connections |
Bottom line?
TL;DR: CyberGhost ticks all the right boxes for privacy — and even adds a few that most competitors skip.
Alright, let’s talk speed next — because privacy means nothing if your video’s stuck buffering like it’s 2009.
Server Network and Speeds
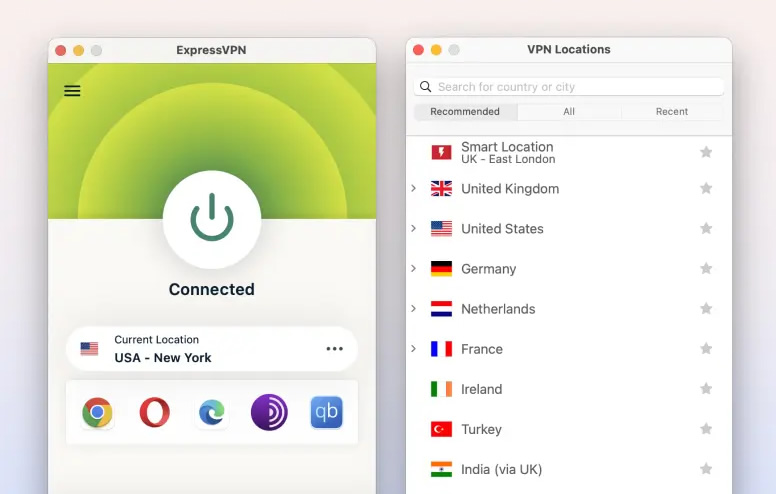
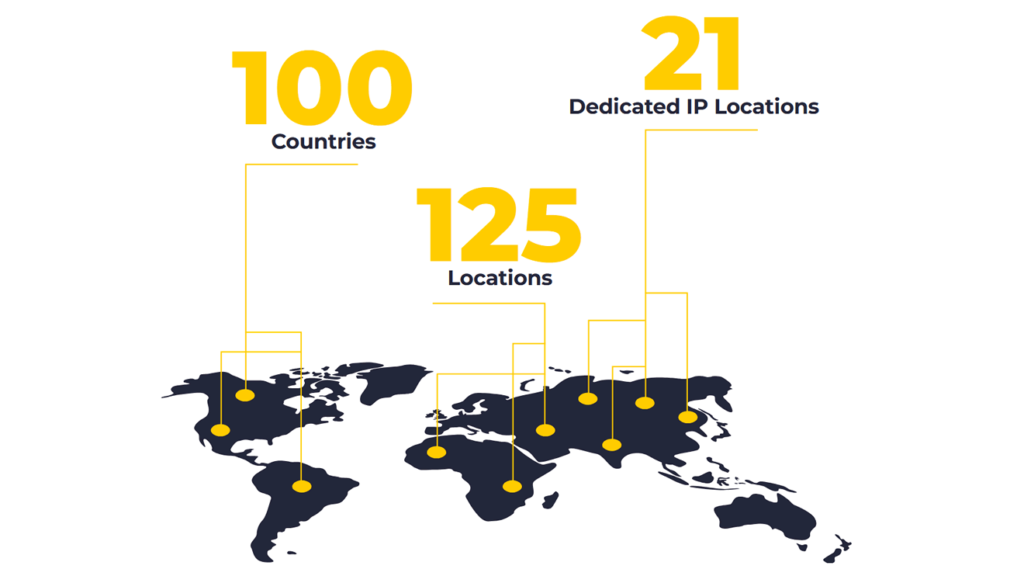
CyberGhost boasts one of the largest server fleets out there, offering 125 locations in 100+ countries (11 in the 🇺🇸 US, 3 in 🥨 Germany, 🥐 France, 🇪🇸 Spain, and the 🇬🇧 UK, and 1 per country for the rest of the world).
They don’t disclose the actual server count, but it’s safe to assume it’s in the 1000s.
Most of the servers (again, it’s not disclosed how many exactly) are physical servers, meaning they are physically located in the specific countries rather than cleverly routing requests.
Sounds impressive, right? But quantity doesn’t always equal quality. So we tested performance in real conditions, across several locations.
Here’s what we found:
- Fast on nearby servers: In our European test locations, we regularly hit 80–90% of our base speed using WireGuard — great for streaming, browsing, and gaming.
- Mixed results internationally: US and UK servers were solid. Asia and South America? Not always. Expect some slowdowns, especially on weekends or when using the OpenVPN protocol.
- Streaming servers are fast (by design): CyberGhost tags specific servers for Netflix, BBC iPlayer, and more. These are optimized for speed and rarely disappoint, even at peak hours.
- WireGuard makes a big difference: If you’re still on OpenVPN, do yourself a favor and switch. WireGuard gives a noticeable speed boost, especially for mobile users.
Of course, raw speed isn’t everything — what matters most is stability.
In our 30-minute continuous-use tests, CyberGhost connections were stable with zero dropouts or reconnections. That’s more than we can say for some “faster” VPNs.
As for the app itself? Switching between server locations takes 2–4 seconds on desktop and around 5 seconds on mobile. Not lightning fast — but not frustratingly slow either.
Oh, and bonus: you can conjure a sigil add specific servers as favourites (e.g. Netflix US or Torrent DE) for quick access next time.
Next up — can this ghost sneak past the streaming giants’ defenses?
Streaming and Unblocking
CyberGhost claims to be streaming’s best friend. And unlike some VPNs that shrink at the sight of Netflix’s geo-blocking army… it actually puts up a very decent fight.
Let’s look at the facts:
- Dedicated servers for streaming: Instead of just saying “we work with Netflix,” CyberGhost actually labels servers by platform — Netflix US, BBC iPlayer, Hulu, Amazon Prime Video, and more. It’s surprisingly convenient.
- Fast enough for HD and even 4K: In our tests, Netflix and YouTube ran smoothly at 1080p from EU and US servers. Some 4K content had minor startup lag, but playback stayed crisp.
- Works with other platforms too: We successfully unblocked Disney+, HBO Max, and even DAZN (though results may vary by region — DAZN is fickle like that).
- Smart TV and Fire Stick support: CyberGhost has native apps for Android TV and Amazon Fire Stick, plus setup guides for others. You can also install it directly on some routers if you’re feeling adventurous.
Here’s a quick overview of test results for major streaming services:
| Platform | Access with CyberGhost |
|---|---|
| Netflix (US) | ✅ Yes (via dedicated servers) |
| Netflix (UK) | ✅ Yes |
| BBC iPlayer | ✅ Yes |
| Hulu | ✅ Yes |
| Disney+ | ✅ Yes |
| Amazon Prime Video | ✅ Yes |
| DAZN | ⚠️ Inconsistent (may depend on location) |
Not all servers are equal, though. Some “regular” ones didn’t work with Netflix during our tests — but that’s why the labeled streaming servers exist. Stick to those, and you’ll be golden.
Pro tip: If a server doesn’t work, just close the app, switch to another labeled server (e.g. Netflix US → Netflix NY), and try again.
Next up: can CyberGhost handle torrents without spilling your secrets? 👀
Torrenting and P2P Use
CyberGhost has long been a favorite among torrent users — and for good reason.
While many VPNs quietly tolerate torrenting, CyberGhost actually embraces it by offering specialized P2P servers that are clearly labeled inside the app. No need to guess which servers work for downloads.
Here’s what stands out:
- Dedicated P2P servers: Optimized specifically for peer-to-peer traffic, these servers help keep speeds up and interruptions down. You’ll find them under the “For torrenting” tab in the app.
- Kill switch + leak protection: Even if your connection drops mid-download, your IP won’t leak. We tested it. It works.
- No bandwidth limits: CyberGhost doesn’t throttle or cap your torrent speeds. As long as your ISP isn’t being sneaky, you’re good to go.
- Jurisdiction matters: CyberGhost is based in 🇷🇴 Romania — where torrenting laws are generally more relaxed, and data retention rules don’t apply to VPNs. That’s a win for privacy.
That said, not all servers allow P2P — some locations (like the US or Singapore) block torrents entirely due to legal pressure. But that’s exactly why the app flags P2P-friendly servers for you.
TL;DR: If torrenting is part of your digital diet, CyberGhost has the infrastructure — and the attitude — to support it.
So what’s this going to cost you, and can you really try it risk-free?
Pricing and Refund Policy
Let’s get to the spooky part: money.
CyberGhost may not be the cheapest VPN on a 1-month plan — but once you look at their long-term offers, things get way more attractive.
Here’s the deal:
- 2-year plan: ridiculously cheap for the first two years and billed yearly after that.
- 6-month plan: a decent middle ground if you’re not ready for a full-on ghost marriage just yet.
- Monthly plan: 5x more expensive, as is quite usual these days for most VPNs. Only worth it if you absolutely need a VPN for a short trip.
What sweetens the deal even more:
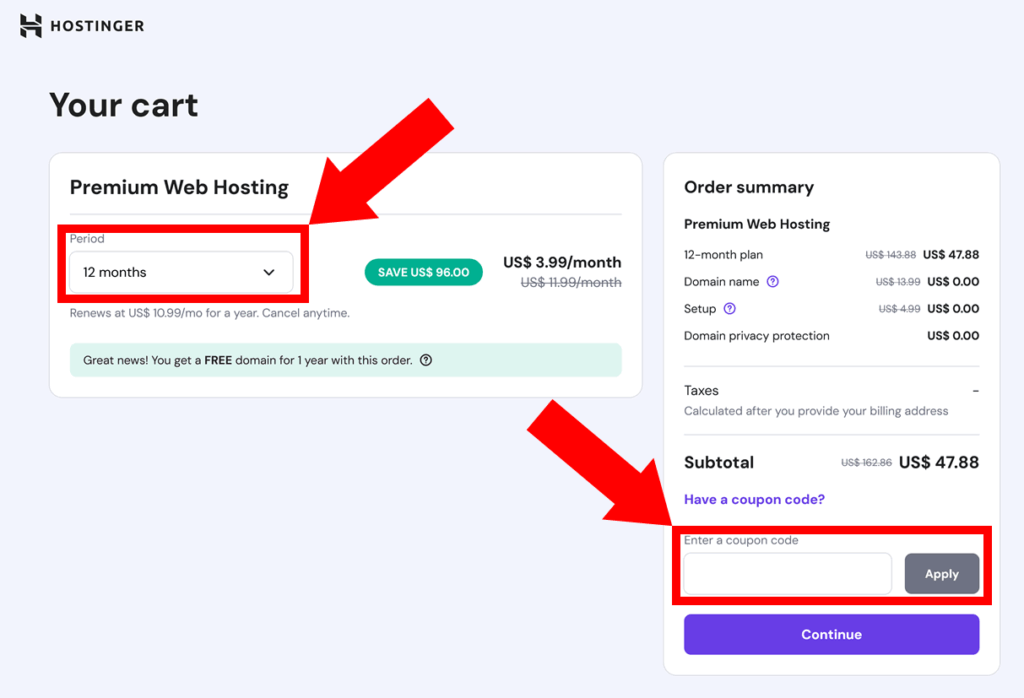
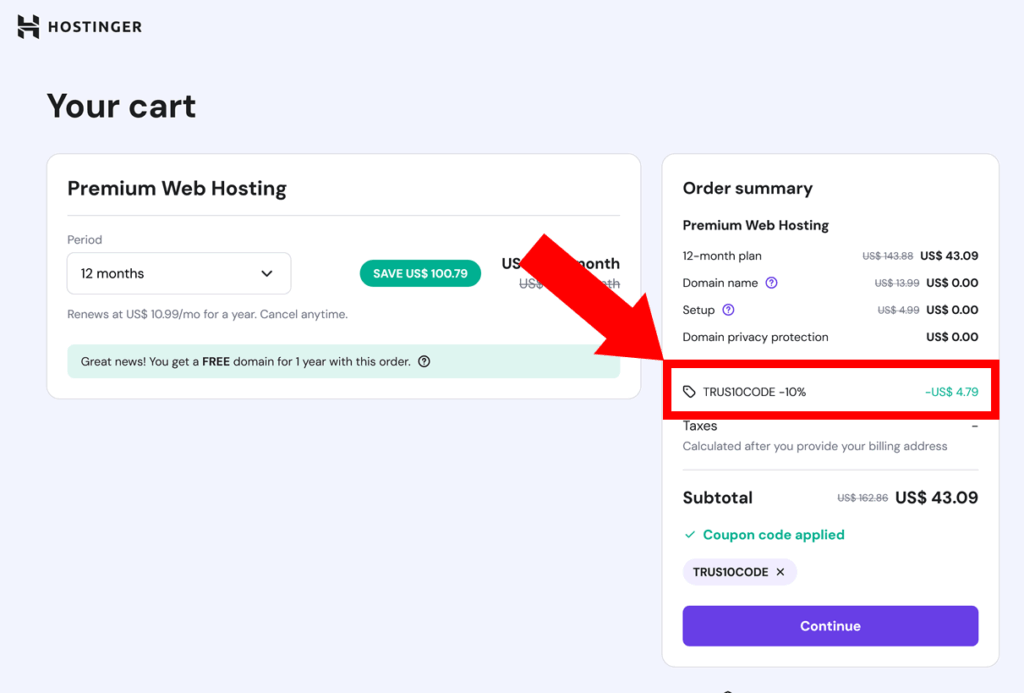
- 45-day money-back guarantee 🛡️ That’s not a typo. You get a month and a half to test-drive the VPN and still get your money back if you change your mind. One of the most generous refund windows in the biz.
- 1-day free trial (desktop only) 💸 Limited, but better than nothing. Just install the app, and you can start testing right away — no payment details needed.
Pro tip: grab the 2-year plan if you’re even mildly convinced — and mark your calendar just in case you want to cancel before the refund window closes.
Oh, and there are sometimes extra months added on top of the 2-year plan (e.g. 2 months free), depending on the promo. We’ll show you how to grab the best one in the bonus section later.
Support and Usability
Even the best VPN is useless if you can’t figure out how to use it — or if things break and no one’s around to help.
Luckily, CyberGhost nails the basics here:
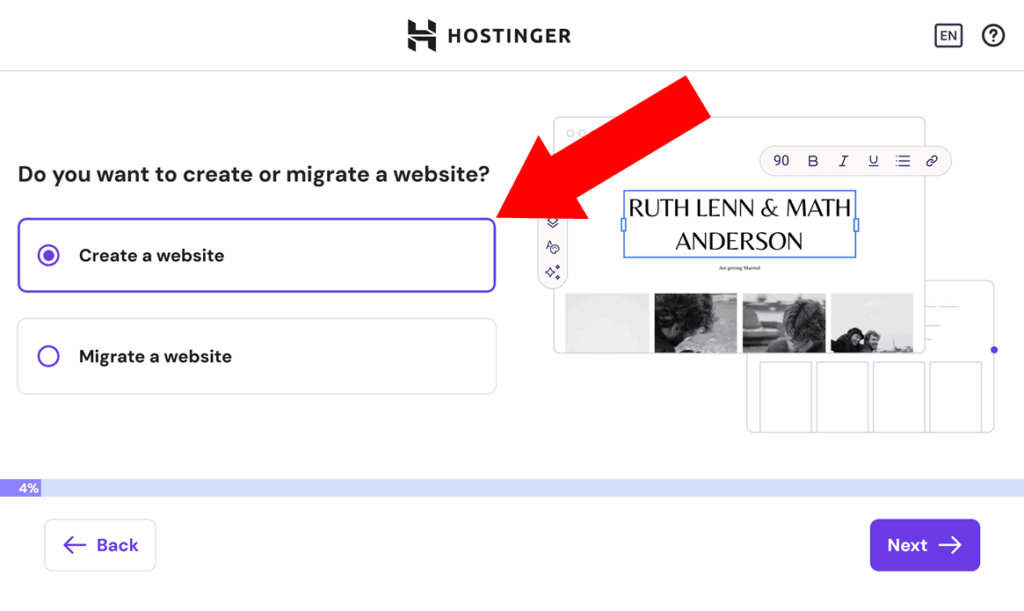
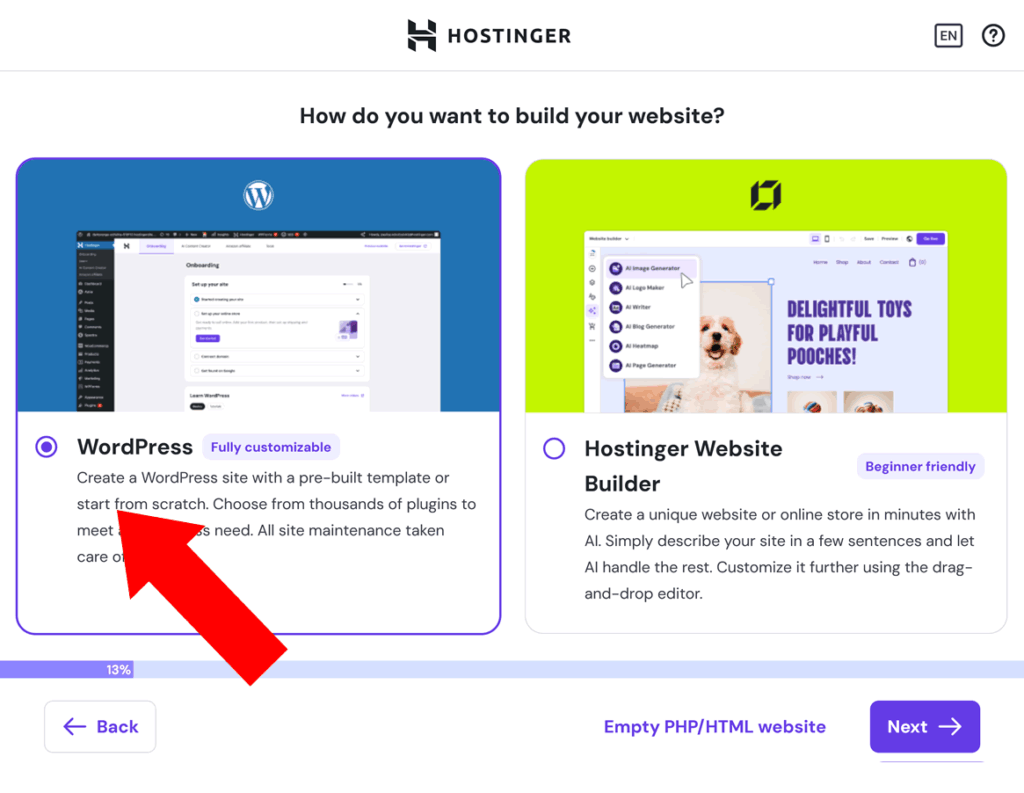
- Easy setup: The apps are available on Windows, macOS, iOS, Android, Linux, Fire TV, smart TVs, and even some routers. Installation takes under 3 minutes in most cases.
- Clean interface: You don’t need a CompSci degree to navigate the app. Server locations, specialty servers (like streaming or torrenting), and settings are all clearly separated.
- Connect on startup + Smart Rules: Want your VPN to auto-connect when you launch your browser or open a torrent app? CyberGhost lets you set up automation — very handy.
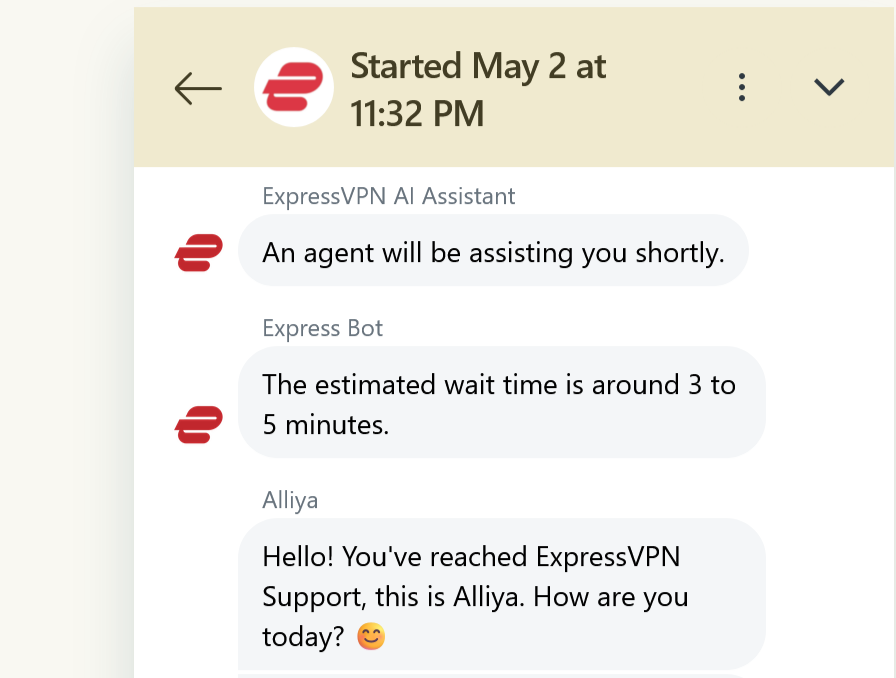
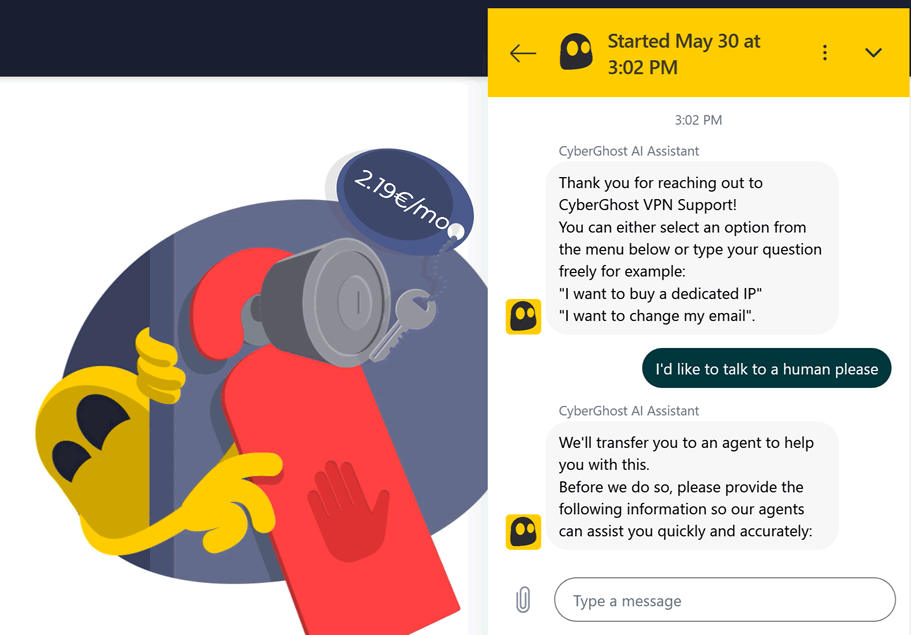
- Live chat support: Available 24/7 from the website. During testing, we reached an actual human in about 7 minutes. Not blazing fast, but decent in our modern AI-filled world.
- Support center: There’s also a searchable help base with setup guides, troubleshooting tips, and a few too many puns (you’ve been warned).
If we’re being picky: the mobile app is slightly more limited than the desktop one (fewer settings, no Smart Rules), but it’s still stable and performs well.
In short: CG doesn’t just protect your connection — it respects your time.
Alright, so we’ve summoned the ghost. Time for our final verdict…
Final Verdict
So, is CyberGhost VPN the real deal — or just a well-branded specter?
Based on our tests, it’s very much alive. Here’s what stood out:
- Excellent streaming support: Dedicated servers for Netflix, Hulu, BBC iPlayer, and more — all clearly labeled in the app.
- Privacy-first approach: AES-256 encryption, a proven no-logs policy, and the extra-safe NoSpy server option hosted in CyberGhost’s own data center in Romania.
- Strong server network: Locations across 100+ countries. Plenty of options, even for picky ghosts – most notably the NoSpy option.
- Beginner-friendly UI: Clean, simple apps that don’t overwhelm you with jargon or options.
- Affordable long-term pricing: One of the best deals around if you’re willing to commit — and with a generous 45-day refund window to test it all.
What could be better?
- Speeds vary on distant servers: Nearby performance is great, but connections to some locations (especially Asia/South America) weren’t always lightning-fast.
- Monthly pricing is steep: The 1-month plan is hard to recommend — go long-term or skip it.
- Support chat speed: Reaching a human takes on average longer than with some other providers; so you’ll need a bit of patience for the cases when your issue or question can’t be resolved by the detailed knowledgebase.
Bottom line:
if you want a VPN that’s beginner-friendly, capable, and privacy-respecting without cursing your wallet — CyberGhost is one of the safest bets in 2026.
Questions? Opinions? Suggestions or requests for improving this review? please do share in the comments section below!