Search results for

"photography"

5 Budget-Friendly Resources to Get the Best Visuals for Your Small Business Website

Up until a few years ago, a ‘fact’ was making rounds all over the Internet and news publications, declaring that the human attention span has shrunk so low that even a goldfish can now focus better than us.

While the fact was debunked in due course, new research emerged and refueled the discussion: our attention spans aren’t shrinking; they are evolving. Human attention span has evolved to… well… pay attention more selectively. With content coming at us from all angles, we have adopted ways to discern which deserves our attention more and for how long.

Understandably, this makes a marketer’s job just a tad more difficult.

Since visuals are the most potent form of grabbing a passerby’s attention, web designers and marketers have to become clever’er and craftier with their images/videos 🦸

For small businesses, this is a more troublesome feat. With limited budget and resources, where hiring a graphic designer is not always possible, what other avenues are left for them to show their visual creativity and capture those fleeting and evolved attentions of their customers?

In this article, we list down 5 tools that will help in adding visual appeal to your web pages. Most importantly, all of them are easy on the wallet and do not involve hours of technical learning.

Most of these are online applications that are super-easy to use and even when a learning curve is involved, it isn’t a steep one and you’ll be able to get the hang of it in almost no time.

Let’s start with web graphics first:

Piktochart: Social and Infographics

When customers first land on a website, it is the visual appeal of it, its aesthetic that conveys important pieces of information about the business to the consumer. For example, if the business is legitimate, is it credible, does it know what it’s doing and so on.

These first impressions are important as they make customers not only decide about your business’ credibility but in what words they’ll be talking to their friends about you.

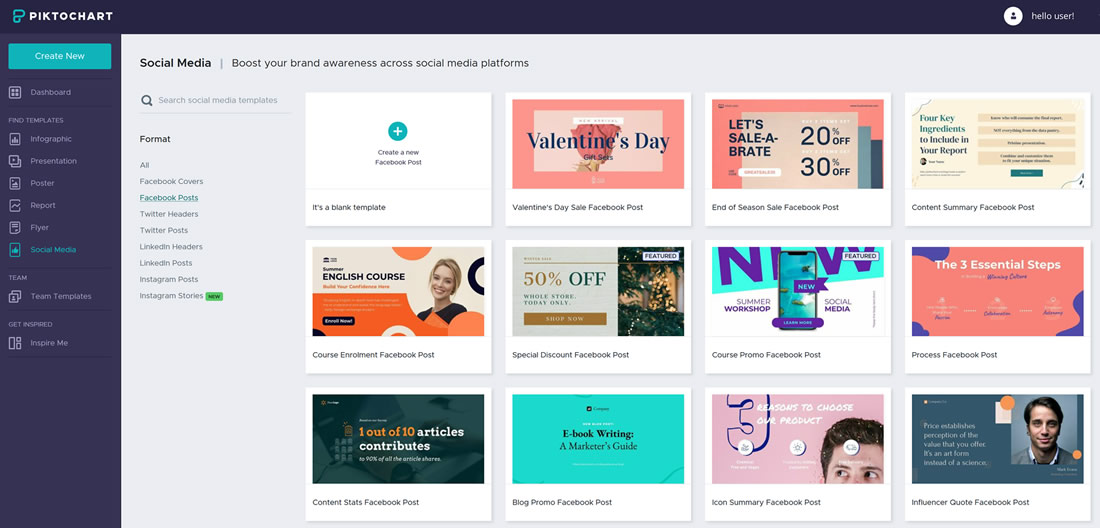
With Piktochart, your website’s aesthetics and designs are well taken care of. These include website header design, individual product images, infographic templates, and not to mention your marketing and advertising visuals.

Pictochart

The only gap in their product offer seems to be site logos, which can be easily tackled by more specialized tools such as LogoDesign.

Piktochart offers a wide range of design templates that fulfill practically any small business design need. The most awesome thing about Piktochart? Many of its design products are free. Even when they’re not, the price tags have been kept low enough to encourage business activity.

Piktochart has been designed not only for companies but for individuals too. So if you are a freelance writer and want to create your online portfolio website (which you absolutely should!), the tool offers easy editing and customization, a wide variety of industry-standard templates, and even helpful tutorials to get you going.

Pexels: Stock Images

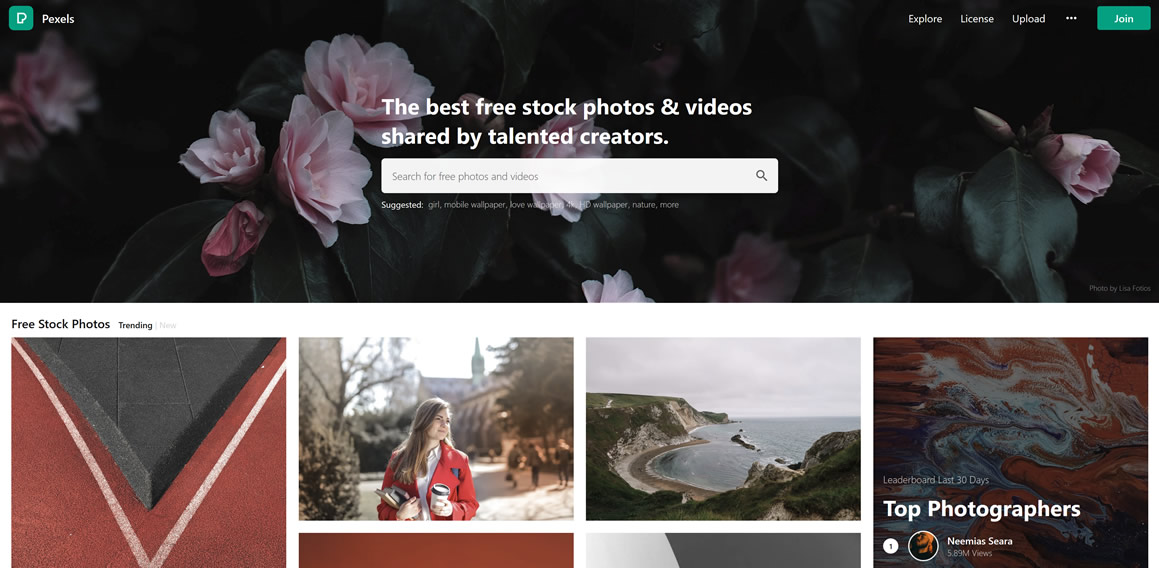
There comes a time in your content marketing journey when you are in need of hi-res photos and will require the help of stock images. Quality stock images, captured by the lens of professional photographers is what drives a large part of content marketing. And Pexels is a great resource to find the images you need.

The site offers such a huge range of photography choices that you are bound to find the exact one that fully represents the emotion you want to convey. Almost every image or graphic you’ll find here is royalty-free, meaning, you can use them freely in your content marketing and other needs as long as you duly credit the photographer – something you should always do.

Pexels

The images you’ll find here are not only creative and imaginative, but they are also pure joy to feast your eyes on. In addition to images and graphics, Pexels also holds an extensive library of free videos.

You can use these videos as your supplementary content, as stand-alone content pieces, or in your digital marketing campaigns. Since the site is free to use, make sure the photos or videos you choose are relatively less-used and therefore less clichéd.

Moqups: Mockup and Imaging Tool

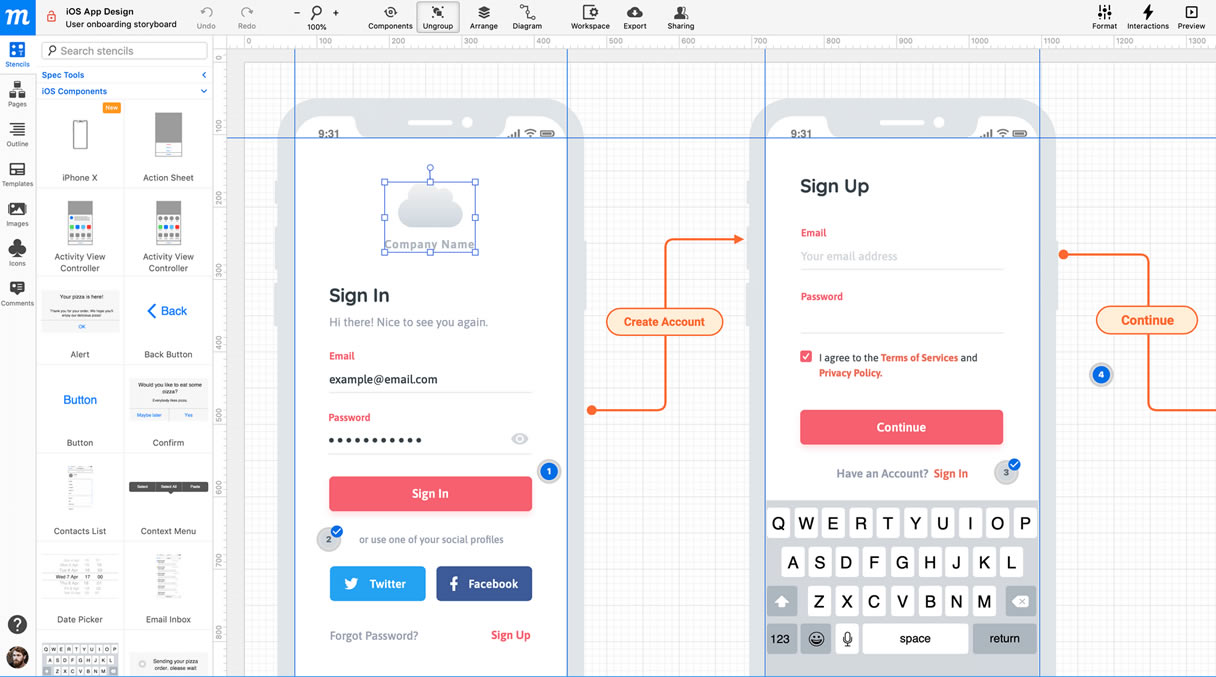
To create detailed mockups that help you see your idea in its visual clarity, Moqups is the tool of choice. This quick design and planning platform is great for sketching, modifying, and refining mockups – in other words,

🙌 helping you and your team collaborate more easily and in real-time.

If your business is about graphic design or web design, this tool is particularly useful as a prototype software. It allows you to add a rough sketch of what you are looking for, enables collaboration with your team on how best to reach the end-goal, and clears up any wrinkles in the evolution of your designs.

Moqup

Moqups is also great when you want to display some visual information or a behind-the-scene representation of a design or product concept. Moqups help you up the ante in your site’s visual department.

Also, the tool is a bargain at $13/month for freelance/personal use and $20/month for teams. For more pricing details, head to their official website.

JPEGmini: Image Compressor

Page load speed is a real issue when it comes to website performance and user experience. Both these factors directly affect conversions, SEO, and therefore ultimately your revenues.

The number one issue that causes sites to load slower is heavy, image-rich content. High-resolution graphics that take up a lot of space and can reduce your otherwise well-optimized web pages to a crawl.

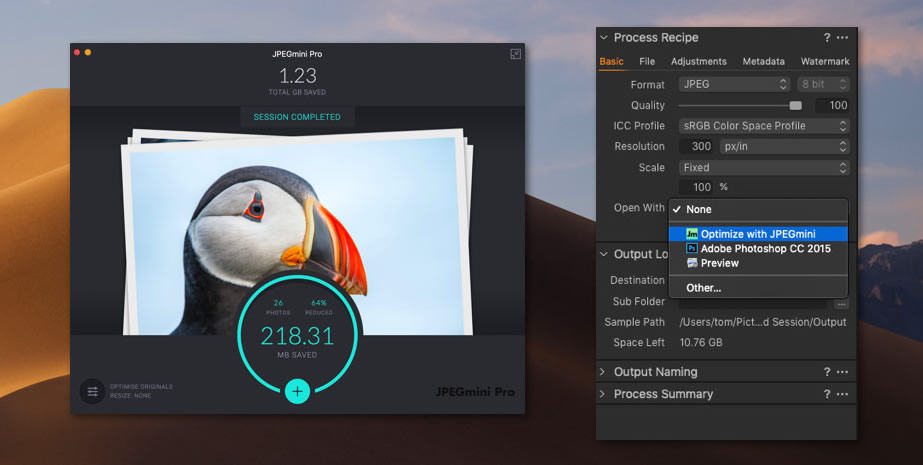
To prevent unnecessary user bounce due to slow page load, JPEGmini is a god-send. It compresses your hi-res image files (up to 80%) without compromising their quality or resolution. This helps your pics load faster, saves you precious server space, improves user experience, and in general makes your site a treat to use.

JPEGmini

The app is available for a one-time payment of $59; the pro suite with additional features will cost you $89. The best thing: you can start a free trial right now before you invest in either and see if it’s something that’s worth it for you.

Filmora: Video Content

For a modern website that wants to stand out, the importance of video can’t be overstated. Videos capture attention, encourage investment, and help convert your visitors into consumers.

Whether its tutorials and How-Tos, a quick tour around the site, a “get to know us” for the company owner and staff, or advertising videos, putting some motion on the screen is a great idea in 2025.

With Filmora, you can get all this done and more!

Filmora

Filmora comes as a downloadable video editing suite, complete with pro-level features yet with a gentler learning curve than such packages as Adobe Lightroom or DaVinci Resolve.

Because Filmora has a plethora of options, it can be a little overwhelming for a brand new user. But, despair not. If you’re willing to get your feet wet in the video world, it can be a rewarding — and on-budget — tool for making your website (and marketing) as engaging as possible.

There is a free trial, after which you can either opt for the pay-as-you-go plan or a one-time purchase. There are discounts up to 28% for students available on their official pricing page.

The Best (Budget-Friendly) Visuals Money Can Buy

In 2025 you don’t need extremely deep pockets in order to unleash your creativity and captivate your audience. You’ll be rewarded by better business if you put aside a (small) portion of your business budget for making your website and campaigns more visually appealing 🎯

Our list here is an attempt to help you with some almost-free sources that make this task that much easier. Some of these tools – most notably Filmora and Moqups – require a bit of a getting used to, but that isn’t a slow curve to follow. And the results on your bottom line are well worth the effort!

Got any experience with any of the tools listed here? Or maybe you’ve used other similar kits to create stunning visuals for your web business? Share your thoughts in the comments section below!

Renderforest Review: a One-Stop-Shop Media Creator for Your Online Business in 2025

Are you in search of an easy tool that can help you create professional-looking logos, promo videos, animations, and slideshows? Didn’t even know such tools existed?

In any case, if you’re considering or already managing a website, there’s no way you can avoid the need of producing brand-related images and videos for your project.

So, today we’re going to review a popular online media editing platform called Renderforest. The tool is getting positive reviews on Trustpilot, as well as social networks – which means it’s high time we figured out:

  • 🎓Can you use Renderforest if you have no prior experience?
  • 💡Which RF tools offer the best value for online projects?
  • 🔧How does their site builder compare to established brands?
  • 💵Which pricing plan should you choose at Renderforest?
  • 👍What do the 10 million existing clients like about RF?

This review will examine the various features of Renderforest to arrive at the final verdict: whether it’s worth using RF for your next online project.

First things first though –

What Is Renderforest?

As you’re probably guessed by this point, RF is an all-in-one tool that lets you create videos, logos, intro videos, slideshows, infographics, and animations.

And it all happens on a single platform – fully browser-based and requiring no subscriptions to start.

The whole idea of Renderforest is empowering anyone to create quality media for their business quickly and rather effortlessly (or at least with a much shallower learning curve than Photoshop or Pinnacle).

The tool has a pretty simple user-interface, making even novices capable of using it without any prior training.

Another thing that makes this tool unique from its competitors is the sheer choice of templates, meaning you can start immediately, working up from the existing samples.

Renderforest in numbers

Moreover, as the platform is cloud-based, the entire editing process is performed online. Neat, but not too exciting in our day and age.

To understand what makes Renderforest stand out from alternative tools, let’s analyze the parts of its toolkit one by one:

The Logo Wizardry

A logo is not merely an image; beyond this, it is a unique identity of your brand that helps you get recognition. A well-crafted logo makes a strong first impression and draws the attention of your potential customers.

In other words, a good logo conveys a slew of messages: your brand is trustworthy, professional, and offers quality services.

And yes, nowadays there are plenty of tools available online to create an eye-pleasing logo. However, not all tools are equal in terms of quality and user-friendliness.

Renderforest Logo Maker

Speaking of Renderforest, the tool claims to help you create a professional looking logo within a few minutes. The company says they use Machine learning algorithms that help them deliver the best design options to users (to be frank, we didn’t see anything that a purely algorithmic tool like LogoDesign.net could not do).

Let’s see how it goes.

The few simple steps to create a logo with Renderforest are quite straightforward:

  1. Go to their Logo Maker, and write down the name of your brand and then hit the “Create My Logo” button.
  2. The next step will ask you for a few lines about your brand – this does not influence your results, but will help generate more lifelike imagery and mockups.
  3. Next, you can select among six general stylistic directions for your logo, like “minimalist”, “flat”, or “watercolor”.
  4. Now you can edit the different elements of your logo, including the font, the icon, and the layout. If you don’t like what you see, you may click on “Create from blank” option to do it yourself.
  5. The last step will let you choose the download option – the free version is low-quality, but still works perfectly fine for a pitch or team discussion. For production logos, a plan with high-definition rendering is of course recommended.

Voila! It’s so smooth it almost looks like wizardry (and technically it is, because it’s a logo-making wizard, get it?).

Does it use machine learning? Unlikely, since we’ve gotten the same suggestions from using very different.

Does it mean it’s no good? Au contraire, the tool is definitely a great help for those who don’t own an expensive Adobe subscription or want to pay hefty sums to graphic designers.

Is their video maker up to the standard?

Creating Videos with Renderforest

Yes, at RF you can easily create a high-quality video without knowing a thing about (or paying for) professional editing software.

To start with, there are free video templates that help you create intro videos and product explainer videos.

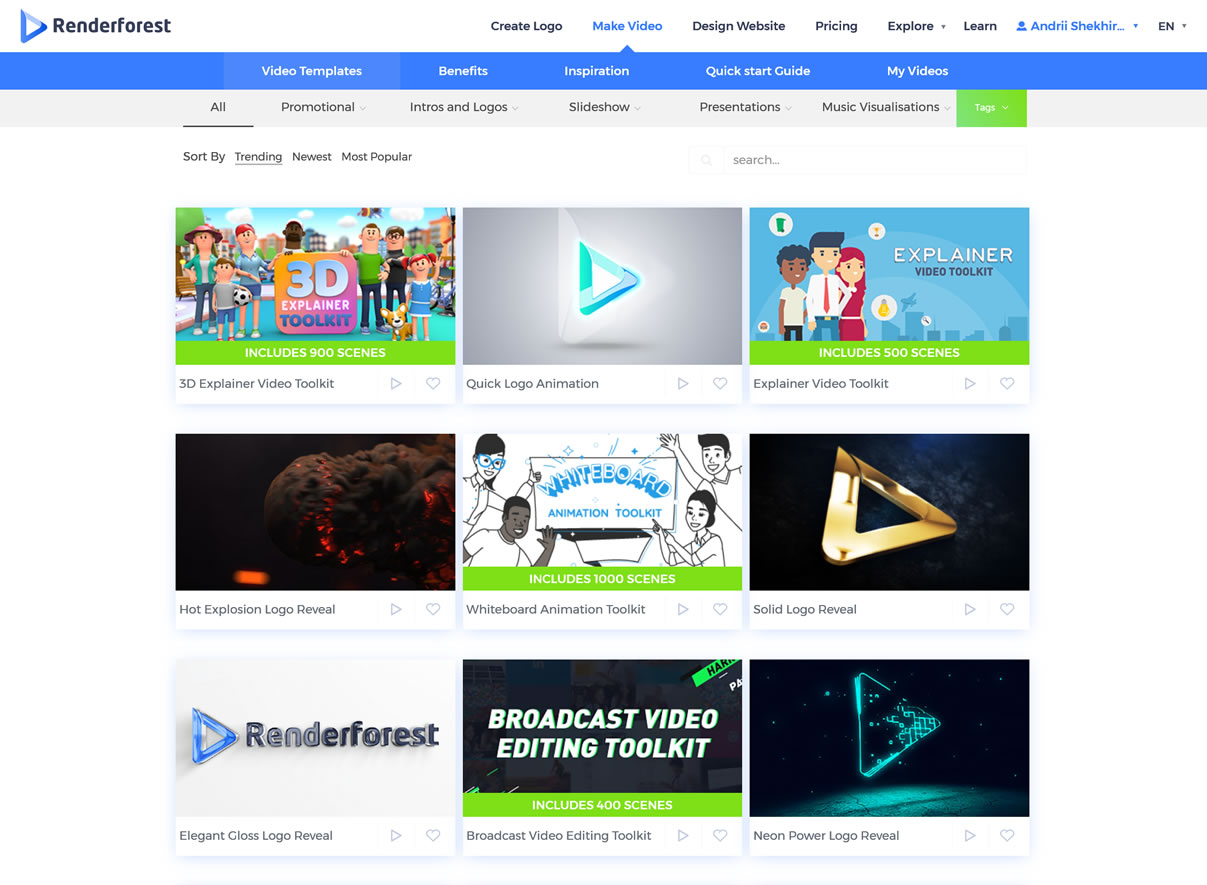
If you want to give your video marketing a unique touch, you may use their 3D explainer video toolkit that has over a thousand of animated scenes. You may sort these scenes by options like “Most Popular”, “Trending,” or “Newest.”

Similar to logo creation, the steps to video creation are quite simple. You need to choose a template, edit your project online, download it, and hit the publish button. Your video is now ready to use!

Renderforest has a stock gallery of commercial videos that you can easily remix and edit without going through any complicated interfaces.

Renderforest video templates

Apart from this, they have more 195.000 high definition royalty-free stock footage that you can use to make your video more professional and appealing.

And of course don’t forget a sound library for those finishing touches to your new video – btw this option allows you to upload your own music as well.

Renderforest as a Site Builder

Alright, you’ve got your cool new logos and videos, now for something to use then on…

Along with the media, Renderforest enables you to design a full-fledged website with the help of their page builder.

The tool is mostly geared towards landing pages, but you can also use it to construct an entire website if you wish – directly in your browser without any coding skills:

  • Renderforest has more than 100 ready-to-use templates for every conceivable purpose, from business and marketing to beauty and photography.
  • The visual editor is simple and minimalist, letting you focus on the essentials. You can make your site live within a few hours without any professional assistance.
  • Not sure this needs to be mentioned nowadays, but the templates are of course fully responsive, that means your website will function properly on all mobile devices, laptops, and desktops.
  • You can create multiple pages and bind them into a navigation menu for a full-blown website. The CMS/structure features are quite basic at Renderforest, so if you really need different content types and all such, WordPress is the preferred option.

Once you’re done, you can publish the website onto an RF subdomain for free or choose the paid plan for a custom domain name, branded email, more storage, and no ads (which is the only option you should consider for live websites that wish to look anything close to professional).

Sounds easy? Because it is! Nothing terribly advanced, so if you’re a professional web developer/designer, you shouldn’t be reading this :)

For everyone else, Renderforest offers a refreshingly simple and stripped-down (in a good sense) version of a visual site builder that lets you get online fast – and finally have somewhere to put that new fancy logo we generated earlier!

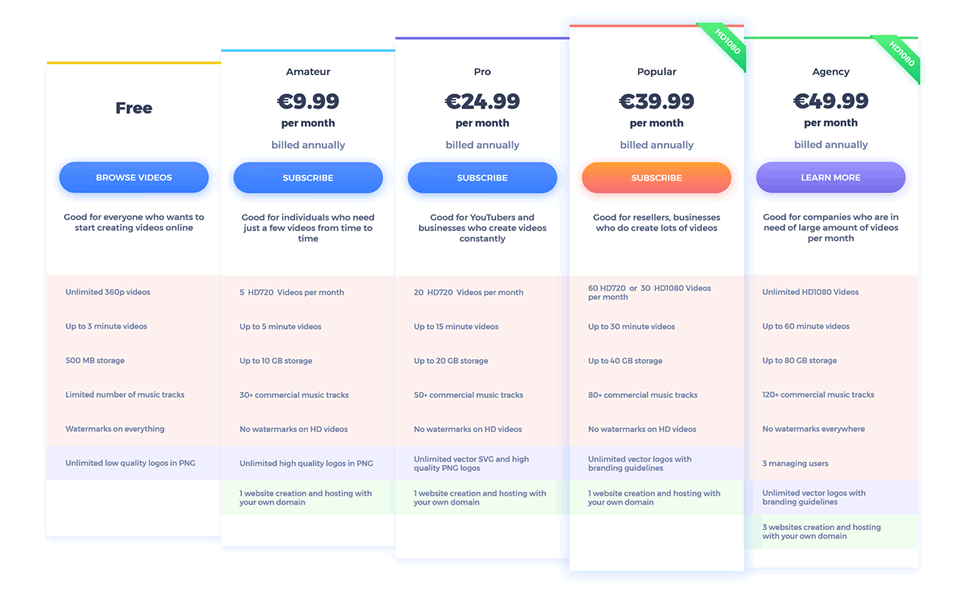
Plans and Pricing

Since RenderForest offers several different products, you are able to choose between a bundled option and individual tools. The respective toggle can be found on top of their official pricing page.

The former is suitable for those who intend to use the service on a regular basis: the Free plan offers unlimited low-quality videos and logos, while the progressively more pricey Amateur, Pro, and Popular plans unlock access to HQ media as well as the website builder.

Renderforest plans

The per-product plans are made for those who wish to use RF only once or twice – otherwise it becomes more lucrative to use the abovementioned subscription option.

The logo and video creation tools each has 4 plans, with the free version leaving a watermark on your video or rendering a low-fidelity PNG logo. The paid options allow you to remove the watermark and increase the quality of the render per your desired parameters.

The Website Maker is also a freemium model, with the paid plan giving you more storage and allowing to publish your site on a custom domain instead of the Renderforest subdomain.

User Satisfaction and Support

What about support, though? After all, regardless of the number of neat features, users will be looking for software that fulfils their needs, and that includes getting help and solving issues when they arise.

Support is available via the phone, by email, or using the contact form on the official RF website. There’s no live chat at the moment, but all the mentioned options are typically more than enough for most of your support needs.

Response time is short, and the team does their best to be as helpful and friendly as possible. In any case, with the tools that are that simple, you are unlikely to encounter too many questions or issues while using the product.

Having helped create over 10 million videos and logos, Renderforest can now boast being a part of G2’s list of the World’s top 100 software companies.

G2 is a global ranking platform that uses proprietary algorithms to assign scores to tech companies based on various customer satisfaction metrics from user reviews, social networks, and other online sources.

Being present on their top-100 list is an indicator of persistently high user opinions about the company and their products.

Should You Use Renderforest?

Time for the final verdict: who should use Renderforest, and is it worth opening your wallet for the paid features?

To recap, RF is a freemium online tool that lets users create videos for YouTube audiences, music visualizations, presentations, corporate slideshows, and other branded media.

The main advantages of Renderforest are definitely simplicity and cost savings: it gives you the freedom to create without asking for hours of training or subscription fees.

Big-budget online projects and advanced webmasters who know how to use tools like Figma and Resolve are unlikely to find anything they haven’t seen before.

For the rest of us bootstrappers and daredevils, Renderforest is a convenient all-in-one platform for fast, easy, and inexpensive media prototyping that definitely deserves a try.

***

Have you already used Renderforest? Any thoughts or questions? Hit us in the comments section below, let’s discuss!

Cómo Crear una Página Web de Cero: La Guía Sin-Sinsentidos para Principiantes 2025

Bien, así que has decidido que necesitas crear tu propia página web. Antes que nada – ¡felicitaciones! Esto significa que estás haciendo algo sobre lo cual el mundo necesita saber. Y cuando digo mundo, me refiero a la mitad del mundo, claro, el resto aún no tiene conexión a internet (¡así que agradece que tú si la tienes!).

En cualquier caso, esta guía te acompañará durante todo el proceso de hacer una página web en una manera clara, concisa, y lo más importante, sin tonterías – tendrás tu propio sitio web perfectamente nuevo en menos de media hora. Y ahorrarás más de €200 (Mex$4,000+ o Col$712,000) en el proceso, concentrándote solamente en lo que es importante y haciendo uso de algunas ofertas jugosas. En otras palabras:

Si, estamos todos ansiosos por comenzar, pero sugeriría repasar un par de cosas primero (no te preocupes, no tomará más de 5 minutos). Sin embargo, en caso de que ya tengas temblores debido a las ansias de crear un sitio web y quieras COMENZAR AHORA MISMO, sólo deslízate un par de párrafos hacia abajo utilizando este enlace en página.

Primero lo Primero

Primero, aclarémoslo desde el principio: si bien esta guía es completamente gratuita (obviamente), no se trata sobre crear una página web gratuito. Cierto, técnicamente es posible crear uno sin gastar un centavo, pero luego necesitarías recurrir a un hosting gratuito (que por lo general apestan horriblemente) o un plan de suscripción gratuita en un creador de sitios web como Weebly (que mostrará anuncios y su marca en tu sitio web, puaj). La razón más importante, de todos modos, es que en ese caso no puedes obtener un dominio gratuitamente, y subirse al pony de otro, como misitio.weebly.com, simplemente no motiva a tus visitantes a tomarte en serio.

Segundo, para aquellos preguntándose “¡¿quién eres tú para decirme como hacer las cosas?!”, aquí hay un breve resumen y/o autoelogio pobremente disimulado: mi nombre es Andrii Shekhirev, soy el fundador de la Satori Webmaster Academy (también conocida como este sitio). Además de crear páginas web para mis propios proyectos y para otras personas desde 2007, soy un Autor Elite en ThemeForest, el mayor mercado de plantillas para sitios web del mundo – mis productos han ayudado a más de 2000 personas a crear sus propios sitios web (y no, no voy a promocionarlos aquí).

A lo largo de los años he probado docenas de maneras de hacer páginas web, así como también creadores de sitios web, proveedores de hosting y sistemas de gestión de contenido. Esta guía es la esencia de lo que aprendí y me complace compartirlo contigo hoy.

¡Uf! Qué bueno que se acabó. Ahora, finalmente, pensé que sería decente comunicarte que esta guía contiene algunos links de afiliados, lo que significa que obtendré una comisión fija del respectivo proveedor si tu, por ejemplo, adquieres un plan de hosting a través del link en este texto.

He aquí la belleza del asunto: este arreglo no afecta el monto que tú pagas, porque el proveedor nos compensa con su propio dinero – para ellos es como redireccionar costos publicitarios. Así que, si te gusta esta guía, considera obtener hosting a través de nuestros links. Hagamos que una inmensa corporación multinacional pague, ¡muajajajaj!

..Eeh, bueno. Volvamos a lo nuestro. Para la última cosa preliminar antes de que comencemos (¡tenme paciencia!), aquí hay algunos de los mitos más difundidos sobre crear tu propia página web. Disiparlos temprano te va a brindar un mayor entendimiento de qué es qué.

Algunos Conceptos Erróneos – ¡Derribados!

Mito número uno: necesitas saber cómo programar para crear una página web. Claro que si. ¡SI VIVES EN 1994! Ahora en serio – como es de esperar, la tecnología ha avanzado un poco desde los primeros días de la Web, y la mayoría de las partes del proceso de construir un sitio web han sido automatizados hace largo tiempo. Incluyendo escribir el código. Solo tienes que elegir las herramientas adecuadas y estar al tanto de algunas cosas importantes (sobre las cuales trata esta guía).

Mito número dos: crear tu propio sitio web te costará un montón de dinero. Sólo si quieres tercerizar completamente con una agencia – que probablemente procederá con los mismos pasos descritos en esta guía de todos modos (y te enviará una gorda factura por eso).

Mito número tres: hacer una página web requiere un montonazo de tiempo. Bueno, a veces sí, especialmente si eres nuevo y estás aprendiendo desde cero. Pero si eres inteligente al respecto y te enfocas en lo correcto, puedes tener un sitio web listo y funcionando en MENOS DE MEDIA HORA. Y el único propósito de esta guía es ayudarte a hacer exactamente eso, ¡así que comencemos!

Paso 1 de 4: Obtén un Dominio y Hosting

Lo primero que necesitas es un lugar para que tu página web viva. En términos técnicos, este lugar es llamado hosting web – en esencia, es una computadora especializada que se mantiene siempre encendida que almacena los archivos de tu sitio web y se los presenta a cualquiera que tipee la dirección de tu sitio web y presione Enter.

Hablando de eso: también necesitarás reservar la dirección en cuestión (como www.ejemplo.com), llamada nombre de dominio. Afortunadamente, puedes hacer ambas cosas de una vez, ya que muchos proveedores de hosting también ofrecen dominios como parte del paquete.

Hay miles de compañías de ese tipo allá afuera, grandes y pequeñas, pero usualmente no tiene sentido elegir las pequeñas: en vez de eso, elige hostings confiables y estables con una larga trayectoria. Quieres que tu sitio web sea accesible las 24 hs del día, los 7 días de la semana, los 365 días del año, y ni siquiera voy a comenzar a hablar de lo tedioso que es mudarse a un nuevo proveedor si tu actual proveedor quiebra. Es muy tedioso, créeme.

De todos los proveedores de hosting que he probado y testeado, el más confiable y fácil de usar continúa siendo GoDaddy: tiene una trayectoria de más de 20 años, tiene más de 17 millones de clientes en todo el mundo y es fácil de usar para principiantes. Y actualmente ofrece algunos descuentos interesantes tanto en hosting como en dominios, lo cual cubriremos pronto.

Para realizar el subsiguiente proceso de solicitar tu hosting tan rápido y fácil como sea posible, recomiendo hacer una pausa e idear el nombre del dominio de antemano: puedes utilizar el buscador de dominios de GoDaddy para encontrar un nombre que aún no exista. Si de todos modos te atascas seriamente, aquí hay algunos tips rápidos para encontrar un nombre de dominio sin registrar que es simultáneamente tan cercano como es posible a tu palabra clave deseada o marca:

  • Considera usar una de las nuevas terminaciones de dominios como .co, .online, .shop o .site en vez de la genérica (y saturada) .es, .mx o .com.
  • Busca sinónimos de tu principal palabra clave usando herramientas online gratuitas como WordReference – cada nueva palabra base abre una nueva rama de oportunidades de nombres de dominios que puede que estén sin registrar.
  • Usa una de las herramientas especializadas para brainstorming de nombres de dominios. La mejor que conozco (y uso frecuentemente yo mismo) es la gratuita Dot-o-Mator, que te permite combinar palabras base con algunos prefijos y sufijos, organizados por tema.
  • Intenta añadiendo componentes universales simples que harán tu nombre de dominio más único (y en consecuencia menos probable que alguien más lo tome), por ejemplo “el” al principio del nombre o un guión para separar dos palabras.

¿Listo? Bien, ahora estamos listos para comenzar. clickea en el botón debajo para visitar la página de ofertas de GoDaddy con descuentos especiales para hosting. Por cierto, ¿recuerdas ese paquete de hosting + dominio que mencionamos anteriormente? GoDaddy ofrece actualmente registro de dominio GRATUITO con cada plan de hosting, lo que te ahorra unos €19 extra (lo que usualmente cuesta un dominio .com):

Obtén 43% de descuento en hosting de GoDaddy + dominio gratuito ›

En esa página, se te presentará un abanico de cuatro planes de hosting: a menos que necesites muchos sitios web a la vez, escoge el plan Estándar, que incluye todo lo que necesitas para empezar.

Luego de añadir el plan a tu carrito, necesitarás hacer varias elecciones para personalizar tu orden: primero, elige cuántos meses te gustaría pagar por adelantado. Si bien puedes elegir el ciclo de pago de 3 años inmediatamente, 12 meses deberían ser más que suficientes para probar tu iniciativa online Y obtener el 43% de descuento. Si decides mantener tu sitio web luego de un año (que esperemos así sea), no necesitarás hacer nada – existe un mecanismo de auto-prolongación (solo ten en cuenta que los siguientes períodos de facturación serán cotizados con la tarifa normal).

Luego, verás en la misma pantalla que GoDaddy agrega copia de seguridad del sitio web a tu orden de forma predeterminada; desmarca esa opción tranquilamente, eso no es importante ahora mismo (además, podrás configurar la misma funcionalidad sin costo adicional más tarde, ahorrandote €23.88 al año).

Tampoco necesitarás la opción de “Seguridad Esencial”, eso también es fácil de conseguir gratuitamente una vez que tienes el sitio web listo y funcionando (¡ca-ching! Ahorraste otros €83.88).

Finalmente, está la opción de Certificado SSL: es la capa de encriptación extra que vuelve el tráfico de tu sitio web seguro – y, más notorio para tus visitantes, muestra un tranquilizador candado verde con una insignia de “Seguro” en la barra de direcciones del navegador. Como si eso fuera poco, Google Chrome ha comenzado a mostrar una clara insignia de “No Seguro” para sitios web sin SSL desde julio de 2018, para dejarnos saber claramente que simplemente no le agradan los sitios web no seguros:

Así que mientras tu sitio web será capaz de funcionar sin SSL, recomiendo encarecidamente obtenerlo inmediatamente (también porque migrar de un sitio web sin SSL a un sitio web con SSL es molesto como un grano en el trasero).

Solo para recapitular, así es como se verá la página de extras de hosting de GoDaddy con todas las configuraciones recomendadas arriba:

Estamos listos para continuar hacia el (ahora gratuito) dominio: después de clickear en el botón de “Continuar” verde, verás una barra de búsqueda para poner el nombre que escogiste antes. Luego de realizar la búsqueda, presiona el botón azul “Selecciona y Continúa” ubicado junto al nombre del dominio, añadiendolo a tu carrito.

¡La etapa final de nuestra orden de hosting! Estoy secretamente emocionado, ya que este es uno de esos momentos “pero espera, se pone mejor”: utilizando nuestro código de promoción, puedes ahorrar otro 30% del precio final:

Solo clickea el link “¿Cuentas con un código de promoción?” justo arriba de la sección del “Total” en la esquina de abajo a la derecha de la página de orden (si, GoDaddy lo hizo tan discreto como les fue posible) luego ingresa esta combinación en la ventana emergente y presiona Aplicar:

GDD1hos

AHORA estás listo para proceder con lo usual – clickea sobre “Crear cuenta” a la izquierda de la página, ingresa tu información de cuenta y facturación, y finaliza la orden. Algo me dice que has hecho compras online antes, así que me saltaré esta parte, si no te importa.

¿Listo? Hagamos la cuenta: hemos ahorrado €84 en hosting, así como también €23 + €83 = €106 en funciones no esenciales que puedes añadir más tarde gratuitamente. Como si eso fuera poco, te ahorras también unos €18 obteniendo un dominio gratuito. Eso es €208 (Mex$4,500+ o Col$740,000+) en ahorros hasta ahora. Bien, bien. ¿Sabes que es aún mejor? ¡Implementar el resto de esta guía no te costará un centavo!

Por cierto, terminamos el paso 1, probablemente la parte más complicada del proceso – buen momento para elongar y tomar un café. Esperaré aquí (porque soy un montón de texto en una página).

..
..

¿Renovado? Ahora al paso 2.

Paso 2 de 4: Instala WordPress

Tenemos un lindo acogedor hosting para nuestro futuro sitio web, así que nada nos impide realmente armar el sitio web mismo. Hagámoslo, ¿vamos?

En caso de que te preguntes, “¿qué carajo es WordPress?”, un breve interludio: WordPress, o WP para abreviar, es lo que llaman un sistema de gestión de contenidos: esencialmente una pieza de software que te ayuda a manejar todo tu sitio web, desde su diseño y contenido hasta su configuración y estructura.

¿Por qué elegir WordPress? Bastante simple, porque es el motor de sitio web preferido de internet, permitiendo el funcionamiento de casi un tercio de todos los sitios web del mundo (y eso es un montón de sitios web). Es gratis de usar o modificar, fácilmente extendible con miles de plugins gratuitos, y presume de una vasta comunidad de usuarios que tienden a asistirse mutuamente. Hay guías, tutoriales y tips sobre cómo usar WP por toda la Web, y la mayoría de ellos son gratis.

Realmente suena como una opción lógica para un dueño de sitio web primerizo, así que vamos a apegarnos a WordPress a lo largo de toda esta guía. Además, tengo algunos tips extra sobre seguridad y rendimiento luego de que hayamos terminado con esta instalación de 3 pasos.

Pues bien, manos a la obra. Inicia sesión en tu cuenta de GoDaddy recientemente creada – verás una lista de productos. Clickea sobre la hilera de “Web Hosting” para expandirla, luego presiona el botón de “Administrar” sobre la derecha. En la nueva página, verás un gran botón azul que dice “Admin cPanel” – ¡esto es lo que buscamos! (en otras palabras, adelante, clickealo).

Serás redirigido a tu panel de hosting – es un lugar importante que sin dudas visitarás muchas veces en el futuro. Pero por ahora encontremos “WordPress” bajo “Aplicaciones Web” (debería verse como una “W” blanca en un círculo gris, igual que el ojo del Pacman come-mundo de ahí arriba, guiño) y clickea sobre el ícono. Te llevará al asistente de instalación llamado…

Clickea en el botón “+ instalar esta aplicación” ubicado en la esquina superior derecha para llegar a la parte importante: en la pantalla de parámetros de instalación, ajustaremos un par de configuraciones.

En el menú desplegable de Dominio, escoge el nombre de dominio que has comprado, en caso de que no sea elegido predeterminadamente; usar una dirección con www versus una sin www es una cuestión de gustos personales, pero si me preguntas, la versión sin www se ve más moderna y es más corta (lo cual siempre es un plus en lo que respecta a direcciones de sitios web).

Asegurate de que el campo de Ruta quede en blanco para que WordPress sea instalado como el sistema de gestión de contenidos primario para tu nuevo sitio web.

Los campos de Versión y Idioma pueden mantenerse como están, así que luego del acuerdo de licencia verás algunas opciones sobre actualizaciones: asegúrate de elegir las actualizaciones completamente automáticas en cada una (las últimas opciones) y activa los respaldos de actualizaciones automáticas en la última.

Esto te asegurará que tu sitio web siempre funcione con el software más reciente, lo que es bueno para la seguridad. También, removerá la necesidad de que tu tengas que buscar personalmente nuevas versiones y realices las actualizaciones manualmente.

Solo para asegurarnos de estar en el camino correcto, la serie de elecciones en esta sección debería ser “3-2-2-1”, o, para visualizar:

Finalmente, está la sección de Configuración donde necesitarás completar los primeros cinco campos (deja los últimos dos botones de opción como están). Primero, completa con el nombre de usuario del administrador del sitio web y la contraseña. Y por el amor de Dios, no utilices las palabras “admin” y “contraseña” – ¡piensa en algo un poquito más difícil de adivinar! Como WP es tan popular, hay muchos hackers alrededor en busca de sitios WordPress con credenciales de admin demasiado fáciles.

Procede a ingresar tu email y el título de tu sitio web y lema (los últimos dos no son tan importantes ahora mismo, podrás cambiarlos en cualquier momento a través de tu panel de admin en WP).

¡Terminamos! Clickea en el botón de + instala ubicado debajo y espera que las hadas mágicas instalen WordPress por ti. Cuando acaben, verás tres enlaces bajo el nombre de tu sitio web: clickea en el segundo enlace – el que termina en “wp-admin”, esta es la terminación estándar para el panel de admin del sitio web.

Se abrirá una nueva pestaña, con un asistente de WordPress que te hará un montón de preguntas tontas e instalará plugins innecesarios, así que clickea “No, gracias.” y continúa hacia tu panel de admin de WP.

…¿Puedes olerlo? ¡El aroma a sitio web por la mañana! Simplemente amo esa sensación de empezar algo nuevo.

Casi que terminamos, pero hay algunas cosas que quizás quieras retocar inmediatamente, porque la experiencia muestra que no todas las configuraciones predeterminadas de WP son las opciones más óptimas.

Paso 3 de 4: Configura WordPress

Antes de que comiences a añadir contenido a tu nuevo sitio web, tomemos un rápido tour del sistema, mientras agregamos algunas mejoras para el futuro.

A la izquierda del panel de admin de WP verás el menú de admin sobre un fondo gris oscuro. No todos los ítems son igual de importantes aquí, y estarás utilizando solo un par de ellos la mayor parte del tiempo. Puedes aprender acerca del resto a medida que avanzas.

Las secciones más usadas son Entradas y Páginas, donde puedes generar contenido nuevo, así como Comentarios, donde puedes moderar los debates en tus publicaciones, en caso de que decidas activar esta funcionalidad.

La diferencia entre una página y una publicación es que la primera es para contenido estático que no se espera cambiar mucho a lo largo del tiempo, como tu página “Acerca de Nosotros”; por otro lado, las publicaciones son para contenido que tu añades regularmente, como noticias o entradas de blog. Aquí hay un pequeño resumen para ayudarte a entender las diferencias entre las dos.

Entradas Páginas
Tienen fecha de publicación Contenido independiente de tiempo
Puede tener autores distintos El autor no es muy importante
Recopilados en forma de blog Menú de navegación de Linked In
Usualmente comparten el mismo diseño Tienen muchos diseños distintos
Bueno para contenido regular y sensible al tiempo como entradas de blog o noticias Bueno para contenido estático como la portada, páginas de servicios/productos, etc.

Existe también un concepto especial de “blog página” en WordPress, que es una página generada automáticamente que muestra todas tus publicaciones. Volveremos a esto más tarde. Por ahora – ¡avancemos!

Otra sección importante del menú de admin de WP es Apariencia, donde puedes instalar el tema visual para tu sitio web (Apariencia → Temas). Te será útil para agregar menús de navegación (Apariencia → Menús) así como también widgets (Apariencia → Widgets) – pequeños bloques que desempeñan funciones específicas como mostrar una lista de categorías o una barra de búsqueda, típicamente en un recuadro. La sección de Apariencia también contiene el Personalizador, que es muy usado por muchos temas modernos para permitirte, bueno, personalizar cosas de tu sitio web, como colores y fuentes.

Y, también está la sección de Plugins donde serás capaz de instalar y configurar varias extensiones que añaden más funcionalidades como seguridad, botones de redes sociales, formularios de contacto, etc. etc.

Bien, ¡este fue probablemente el tour de WP más veloz de la historia! Para finalizar nuestra instalación, retoquemos algunas configuraciones en la sección Ajustes al pie del menú de admin:

Ajustes → General: ¿recuerdas que dije que puedes editar el “Título del Sitio” y el “Lema del Sitio” más tarde? Aquí es donde puedes hacerlo. También, asegúrate de que las opciones de “Miembros”, “Zona horaria”, “Formato de fecha”, “Formato de hora” y “La semana comienza el” se encuentren establecidas de acuerdo a tus preferencias.

Ajustes → Lectura: solo toma nota de esta sección por ahora; aquí serás capaz de de configurar la página principal de tu sitio web para mostrar tus entradas de blog o una página estática (una vez que decidas cual de esas dos opciones deseas). Si no configuras la página de entradas de blog como tu página principal, podrás elegir un lugar diferente para esto – solo crea una nueva página vacía en la sección de admin Páginas mencionada anteriormente. Luego, vuelve aquí y úsala como tu página no-principal de entradas de blog; esa página automáticamente empezará a visualizar tus publicaciones una vez que guardes los cambios.

Ajustes → Comentarios: Si estás dispuesto a permitir que la gente comente en las publicaciones en el blog/newsfeed de tu sitio web, asegúrate de marcar la casilla “Permite que se publiquen comentarios en los artículos nuevos” así como también “Activar los comentarios anidados hasta X niveles” (así la gente puede responder los comentarios de otras personas) y “El comentario debe aprobarse manualmente” (te llegará TANTO SPAM de otra manera). Lo que sea que hagas, desmarca la opción de “Permitir avisos de enlaces desde otros sitios”, es solo para permitir mucho spam. Finalmente, echa un vistazo rápido a la sección “Enviarme un correo electrónico cuando ”, asegurándote de que las opciones estén configuradas según tus preferencias personales.

Ajustes → Enlaces permanentes: altamente recomiendo elegir la opción de “Nombre de la entrada”, ya que genera los URLs más agradables para el ser humano para tus páginas y publicaciones (no estoy del todo seguro de porqué las otras opciones en esta subsección existen, para serte franco).

Básicamente, ¡eso es todo! Ahora puedes jugar con tu nuevo sitio web y comenzar a agregar contenido. Sin embargo, hay un paso más, que es un poco opcional pero claro, más bien esencial:

Paso 4 de 4: Añade un Tema y Plugins

En principio, podrías dejar la apariencia del sitio web como está y enfocarte solamente en el contenido. No obstante, eso significaría que tu sitio no solamente se vería muy genérico, pero se vería de hecho exactamente como quichicientos de otros sitios web que fueron muy perezosos para cambiar el tema predeterminado.

Además, hay muchos temas WP disponibles gratuitamente que ofrecen mucho más en modificaciones y personalizaciones, permitiendo que cada sitio web se vea único.

Aunque aquí va una publicidad descarada: procederé y sugeriré probar nuestro propio tema WP multiusos llamado Bento (puedes ver que nos agrada Japón aquí en Satori :)

El tema te permite modificar el color y la apariencia de virtualmente cualquier elemento de tu sitio web, crear diseños de cuadrículas adaptadas para teléfonos móviles para cualquier página, así como también montones de otras cosas útiles listadas aquí en la página oficial:

Obtén Bento gratis ›

Además, Bento está bien documentado (lo cual no siempre sucede en el mundo WordPress) y tiene foros de soporte dedicados donde respondemos todas las preguntas acerca del tema.

/ fin de la autopromoción descarada /

En cuanto a plugins, hay literalmente más de 50.000 gratuitos distintos disponibles en cualquier momento, agregando varias nuevas funcionalidades a tu sitio web desde traducciones y ventanas emergentes a foros y comunidades (y no, no creamos plugins, así que no esperes ver un link a una extensión “Sushi” o “Kamikaze”).

En lugar de eso, enumeraré solamente un par de los plugins más confiables y universalmente útiles que casi todo dueño de sitio web debería considerar instalar – basado en mi propia experiencia, las reseñas de otras personas, así como también estadísticas objetivas. Son todos gratuitos, claro:

  • Akismet para filtrar spam automáticamente de tus comentarios. ¡Este es un salvavidas! O al menos un ahorrador de tiempo, ya que descarta eficientemente todos los comentarios con links a spam y spam en forma de texto. Akismet usa una especie rara de algoritmos voodoo de aprendizaje de máquina para realmente mejorar con el tiempo.
  • All in One SEO para optimizar el motor de búsqueda. Este es probablemente uno de los mejores plugins de WP para configurar metadatos adecuados en tu sitio web para que tu contenido no se vea horrible en los resultados de Google. A Google le gusta esta clase de atención al detalle, mucho.
  • Google Analytics Dashboard para mantenerte al tanto de los visitantes. También necesitarás una cuenta de Google Analytics propiamente dicha, claro, que puedes abrir gratis en su sitio web oficial.
  • Contact Form 7 para permitir a tus visitantes enviarte mensajes. Con el fin de recibir un email cada vez que alguien te envíe un mensaje en tu sitio web, también necesitarás un plugin de mail como WP Mail SMTP (aquí hay algunos enlaces para ayudarte a ponerlo en marcha con el sistema de email de GoDaddy: 1, 2).
  • WooCommerce ¡para vender cosas online! Te permite convertir fácilmente tu sitio web WP en una tienda online propiamente dicha, completa con sus listados de productos, proceso de compra y entrada de pago. Para lo último podrías necesitar instalar complementos de WooCommerce (plugins para plugins, si), de los cuales hay docenas (eso sí, algunos no son gratis).

Así que si, hemos oficialmente terminado. ¡Disfruta de tu reluciente nuevo sitio web! En caso de que desees algunos consejitos más y prácticas recomendadas, continúa hacia la última parte de esta guía, apropiadamente titulada:

Tips Útiles (Opcional)

No me he olvidado de mis precedentes promesas de discutir los métodos gratuitos para mejorar la seguridad online y hacer copias de seguridad, así que aquí están.

Tip #1: Hacer tu sitio web más seguro. Mientras tu sitio web es aún joven e inocente, probablemente quieras enfocarte en otras cosas porque nadie quiere hackearlo aun. Sin embargo, existen esas cosas súper simples que te tomarán casi nada de tu tiempo pero reducirán las chances de convertirte en un blanco de un ataque exitoso por un factor de 10.

Primero, las recomendaciones obvias (que el 99% no siguen): no utilices “admin” para tu nombre de usuario de panel de admin de WP, simplemente usa cualquier otra palabra. Solamente esto hará que tu sitio web de WordPress sea mil veces más difícil de crackear. Y usa una contraseña fuerte – con mayúsculas, números, símbolos y demás. Para resistencia extra, usa autenticación de dos factores (un código adicional generado por tu smartphone mientras accedes a tu cuenta).

Otro hábito que suena obvio pero muchos ignoran: mantener tu WordPress, así como también plugins y temas al día. Ya hemos cubierto eso en el Paso 2 (“Instala WordPress”), pero también tiene sentido prestarle atención a cualquier anuncio de actualización en tu admin WP.

Para aquellos de ustedes del lado cauteloso, puedo recomendar instalar el plugin gratuito Wordfence – tiene toneladas de opciones de protección extra que ayudarán incluso al administrador de sitio web más paranoico a dormir bien por la noche.

Tip #2: Copias de seguridad automáticas y fáciles. Porque no quieres pasar tiempo haciéndolo manualmente cada vez. Tienes mejores cosas que hacer, ¡como crear contenido para tu nuevo sitio web! Una palabra: UpdraftPlus. Es gratis, es súper fácil de instalar y configurar, y puedes elegir almacenar copias de seguridad en una variedad de lugares, desde tu propio servidor (aunque no es recomendable) a almacenamiento en la nube.

Personalmente uso la opción de Google Drive en Updraft, lo que ha sido hecho aún más fácil de configurar luego de que introdujeran su integración propia. P.D. la versión gratuita tiene todo lo que necesitas para un sitio web normal, ni yo mismo he probado la versión Pro pese a manejar múltiples proyectos online de diversas complejidades.

Tip #3: Estructurando tu sitio web. Una vez que el dominio, el hosting y WordPress han sido instalados y configurados, es momento de pensar acerca de cómo será organizado el contenido de tu sitio web. Como mencionamos arriba, hay dos tipos básicos de contenido que WP soporta listos para usar: publicaciones estilo noticias (contenido regular) que puede ser mostrado en una página de entradas de blog, así como también páginas (contenido estático) que son usadas para mostrar información que no es modificada muy a menudo.

Antes de crear las páginas y las publicaciones, tiene sentido esbozar la estructura completa en un diagrama con forma de árbol sobre una hoja de papel, recordando marcar cuáles elementos aparecerán en el/los menú(s) de navegación del sitio.

Además, dependiendo el propósito de tu sitio web, probablemente te enfrentes a la necesidad de usar tipos adicionales de contenido, si eres un fotógrafo o diseñador, el Easy Photography Portfolio te permitirá crear una sección separada con fotos y las exhibirá en elegantes galerías. Si estás planeando vender cosas en tu sitio web, WooCommerce creará el tipo de contenido para tu producto automáticamente. Simplemente explora el repositorio de plugins, hay una probabilidad del 100% que lo que necesites ya ha sido creado y esté disponible gratuitamente.

Concluyendo / Momento de Preguntas y Respuestas

¡Bazinga! Hemos aprendido a crear sitios web, ahorramos más de €200 (Mex$4,000+ o Col$712,000) en el proceso y quizás hasta nos divertimos… ¿un poquito, quizás?.. Bien, probablemente fue más trabajo que placer, pero definitivamente valió la pena.

Si te gustó esta guía, ¿qué te parece compartirla en las redes sociales (si, ya se, ya nadie hace eso, pero aun así, tenía que decirlo) y ¿quizás también les puedes comentar a tus amigos novatos al respecto? OK, está bien, Twitter es suficiente :/

¿Sigues aquí? Estoy un poco sorprendido, para serte sincero. Bueno, no se… Si tienes alguna pregunta más acerca de lo que hemos hablado en esta guía, házmelo saber en la sección de comentarios debajo, la chequeo de vez en cuando, en serio. Y si deseas añadir algo a la guía o enviar alguna crítica, ¡¡guardatelo para ti mismo!! Es broma, por supuesto que son también muy bienvenidas etc. etc.

Mantente curioso, alcanza las estrellas y ¡la mejor de las suertes en lo que sea por lo que estés creando tu sitio web! Gracias

How to Make a Website in 2025 (Even If You’re Not Sure You Need One)

☑︎ This guide has been updated for 2025

So, you want to make a website.

Maybe it’s for your side project, your business, your freelance portfolio… or maybe you just want a piece of the internet that’s truly yours.

Either way — congrats! You’re already ahead of most people by asking the right question: how the heck do I actually start?
Here’s the good news:

⚡You DON’T need to know code.
⚡You DON’T need to hire a developer.
⚡And you definitely DON’T need to spend a fortune.

This guide will walk you through the process step-by-step, in plain human language — no jargon, no bloated tech speak, no “just install Nginx and modify your DNS zone file” nonsense.

In fact, by the time you’re done reading, you’ll know exactly:

  • Whether you even need a full website in the first place (spoiler: sometimes you don’t!)
  • Which path fits your needs best: Wix? WordPress? Framer? Something else entirely?
  • What steps to take — and in what order — to go from zero to “it’s live!”

Let’s get started.

Step 0: Do You Even Need a Website?

Let’s be honest — in 2025, having a website isn’t always the default move anymore.

Depending on what you’re trying to do, a full-blown website might be overkill… or even a distraction.

So before you dive headfirst into domain names and drag-and-drop editors, let’s take a moment to ask the real question:

Do I actually need a website — or is there a faster, cheaper, smarter way to achieve the same goal?

Here’s a quick cheat sheet:

  • Want a personal brand or professional presence online? A website is still king.
  • Launching a new product or startup? A website is your control center.
  • Freelancer or consultant? Clients expect to find you via Google.
  • Running a brick-and-mortar business? A site helps with trust, bookings, and directions.

But sometimes…

Still unsure? Here’s a quick rule of thumb:

  • If you care about owning your space (and not being at the mercy of a platform’s algorithm or terms), build a website.
  • If speed, simplicity, or zero-maintenance is your top priority — start with a hosted solution or social platform, and upgrade later if needed.

Here’s the bottom line:

A website gives you maximum freedom, customization, and long-term flexibility. But it’s okay to start small elsewhere — and circle back when you’re ready to go full pro.

Assuming you’re still in the “I need a website” camp –
Next up: let’s figure out what type of website suits you best.

Step 1: Choose Your Website Path

Alright, so you’ve decided a website is worth building. Awesome.
Now comes the next big question:

What kind of website should I make — and how?

The answer depends on what you want your site to do, how much control you want, and how much time (or money) you’re willing to invest.

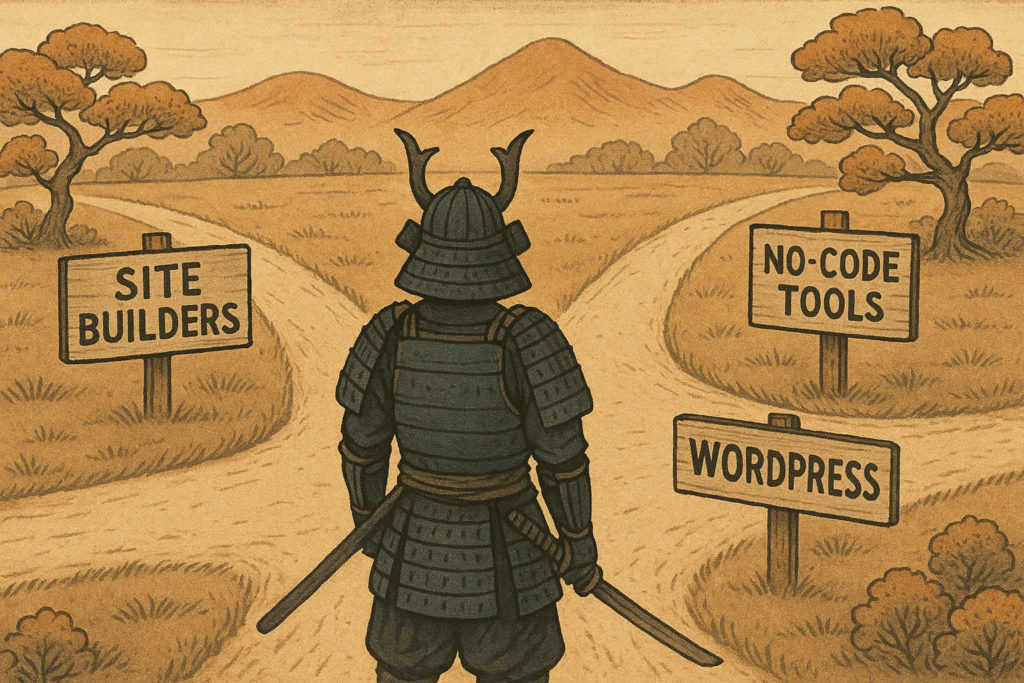
To make things easier, we’ve grouped all the popular methods into three big buckets:

  • Website builders like Wix, Squarespace, or Weebly – perfect if you want something visual, fast, and low-maintenance.
  • WordPress (self-hosted) – best if you want full flexibility, control over your data, and a giant ecosystem of themes, plugins, and tools.
  • Modern no-code site builders like Framer, Typedream, or Carrd – great for landing pages, personal sites, and startup MVPs.

Let’s quickly compare them:

Platform Type Ease of Use Design Control Cost Best For
Classic Website Builders ⭐⭐⭐⭐⭐ ⭐⭐⭐ $-$$ Portfolios, small biz, local shops
WordPress (self-hosted) ⭐⭐ ⭐⭐⭐⭐⭐ $ Blogs, scalable sites, SEO-heavy projects
No-Code Builders ⭐⭐⭐⭐ ⭐⭐⭐⭐ $ Startups, personal sites, quick MVPs

Still not sure? Think of it this way:

  • Want speed and simplicity? → Try a website builder (see our comparison here).
  • Want long-term flexibility and SEO performance? → Go with WordPress.
  • Want something that looks designer-grade out of the box? → Look at Framer or Typedream.

Next up: let’s break down each option so you can pick the one that fits your needs – no guesswork required.

Option A: Website Builders

If you want to get online fast — without touching a single line of code — website builders are your best friend.

These platforms handle everything for you: hosting, design, updates, and even domain connections. It’s all bundled into one nice, beginner-friendly package.

You just drag, drop, type, click “Publish” — and boom, you’re live.

Here are the top contenders worth considering:

  • Wix – the most versatile builder out there. Tons of templates, powerful editor, and a massive app marketplace.
  • Squarespace – known for beautiful templates and a more polished, minimalist vibe. Great for creatives and portfolios.
  • Weebly – simple, solid, and very budget-friendly. Owned by Square, so built-in ecommerce is a plus.

So who are these tools perfect for?

  • You want a site that looks good without hiring a designer
  • You want to launch fast (like, same-day fast)
  • You’d rather pay a few bucks a month than deal with updates, security, or hosting headaches

But there are also a few trade-offs to keep in mind:

  • You’ll have less control over SEO, speed, and custom code (compared to WordPress)
  • Switching platforms later isn’t always easy — migrating from a builder to another system can be a pain
  • Some features are locked behind higher-tier plans (e.g. ecommerce, membership, analytics)

💡 Pro tip:

Most builders offer a free plan or a free trial — so you can test things out before committing. If you’re not sure which to choose, start with Wix or Squarespace — both are solid all-around options.

If you want to learn more about site builders and compare your options – head over to our dedicated analysis.

Next up: want more control and flexibility? Then you might be a WordPress person 🌞

Option B: WordPress (Self-Hosted)

If website builders are like renting a fully furnished apartment 🛋️ then self-hosted WordPress is like buying a plot of land and building exactly what you want on it 🏡

It takes a bit more setup — but the flexibility is unbeatable.

Over 40% of all websites online run on WordPress. That includes everything from personal blogs and portfolios to full-blown media empires and ecommerce stores.

So why is it still so popular?

  • It’s 100% free and open-source (you only pay for hosting + domain)
  • You can install any theme or plugin to change the design or add new features
  • Great for SEO, speed optimization, blogging, and scaling
  • You truly own and control everything — no platform rules or limitations

But there’s a flip side too:

  • It’s not all-in-one — you’ll need to choose a hosting provider such as Hostinger (don’t worry, we’ll help)
  • There’s definitely a learning curve, especially if it’s your first time building a site
  • You’ll need to take care of updates, backups, and occasional maintenance (or install plugins to help)

That said, modern WordPress has gotten a lot friendlier — especially with tools like:

  • Page builders like Elementor, Spectra, or Kadence Blocks (drag-and-drop without code)
  • Starter themes that look good out of the box — like Astra, Neve, or Blocksy
  • One-click installers from most hosts that set everything up for you

Overall, WordPress is 🏆 best for bloggers, creators, service-based businesses, agencies, and anyone who wants to grow their website over time – without running into platform limits.

Next up: want something even more minimal, stylish, or startup-y? Let’s look at modern no-code builders.

Option C: Modern No-Code Site Builders

If traditional builders feel too clunky — and WordPress feels like too much commitment — you might love the new wave of ultra-slick, no-code tools.

These platforms are built for speed, simplicity, and style — often used by indie makers, startups, and anyone who wants to launch fast with a polished vibe.

Think: the “cool startup website” look, but without hiring a designer or writing a single line of code.

Here are a few standouts:

  • Framer – blazing-fast, designer-focused site builder with beautiful animations and responsive layouts out of the box.
  • Typedream – like Notion, but for websites. Clean, minimal, dead-simple to use.
  • Carrd – the MVP king. Ideal for personal pages, portfolios, and “link in bio” setups. Plans start at literally $9/year.

So why pick a no-code builder?

  • They’re ultra-fast to set up – often ready in under an hour
  • They feel modern — great design, responsive layouts, built-in animations
  • They work especially well for one-pagers, landing pages, portfolios, or simple startup sites

A few caveats though:

  • Not ideal for complex content sites, blogs, or custom backend features
  • You’re somewhat limited to the visual style of the platform (especially with Typedream and Carrd)
  • Some advanced features (like forms, analytics, custom scripts) may require upgrades or workarounds

💡 Pro tip:

No-code builders are also a great way to test ideas quickly — build a landing page, validate an offer, or create a one-pager for your project before investing in a full site.

Next up: you’ve picked your tool – now let’s plan what actually goes on your website.

Step 2: Structure and Plan Your Content

Before you start dragging widgets or choosing fonts, it helps to know what your website is actually going to say.

Think of this step as sketching the blueprint 📋 before building the house. The good news? You don’t need to overthink it. Let’s break it down:

🔹 Pages vs Posts

If you’re using WordPress (or anything blog-capable), you’ll see two content types: pages and posts.

Quick difference:

Pages Posts
Static content (About, Contact, Services) Time-stamped articles or updates
Usually part of your main site structure Usually shown in a blog or newsfeed
Organized via menus Organized via categories and tags

💡 Think of “pages” as the permanent stuff, and “posts” as things you publish over time (like updates, tutorials, or case studies).

🔹 Must-Have Pages for Most Sites

Here’s a classic starter structure for a small site:

  • Homepage – who you are, what you do, and how you can help
  • About – your story, values, team, or background
  • Services / Work / Products – what you offer, with links or pricing
  • Contact – how people can reach you (form + email + maybe links)
  • (Optional) Blog – if you plan to share updates or articles

You don’t need to write everything now — just create a quick outline for each page. A bullet list is enough.

🔹 Pro Tip: Map It Out

Grab a pencil and draw your ideal site on a piece of paper — boxes for pages, arrows for links.

Yes, seriously.

Even in 2025.

You’ll be surprised how much clarity it brings.

Or use free tools like Figma (for wireframes) and Octopus.do (for quick sitemaps).

Once you’ve 🗺️ mapped out what goes where, you’re ready to start designing.

So up next: let’s talk logos, fonts, and the fun stuff — without spending weeks pixel-pushing.

Step 3: Design and Branding

Here’s where your website starts to look like… well, you.

But don’t worry — we’re not going to lecture you on color theory or make you choose between 92 fonts.

This is about getting a clean, cohesive look without going down a 4-hour Pinterest rabbit hole.

Let’s hit the essentials:

🔹 Logo (or Just a Name)

If you already have a logo – great, upload it and move on.
If not? Don’t sweat it. You don’t need a perfect brand mark to launch.

Instead:

  • Use your business or personal name spelled in a clean font that matches your project’s vibe — and call it a day.
  • Or generate a simple logo using tools like:
    • Looka – simple AI-generated logo designs
    • Canva – drag-and-drop logo templates (free tier works fine)
    • Hatchful – quick and easy branding sets

🔹 Fonts and Colors

Pick 1–2 fonts max. One for headlines, one for body text. Good pairings = simple and readable. Try these (all free options by Google Fonts):

  • Heading: Montserrat / Raleway / Playfair Display
  • Body: Open Sans / Lato / Inter / Roboto

Need help picking a palette? Use:

Keep it simple: one main color, one neutral (gray/black/white), and one accent if needed.

🔹 Images and Visuals

It’s 2025, so skip the cheesy stock photos. Use high-quality visuals that actually reflect your project’s essence:

  • Unsplash – gorgeous, free high-res images
  • Pexels – clean modern shots for landing pages
  • SVG Backgrounds – abstract patterns and backdrops

And yes — Canva works for all of the above if you want to create headers, mockups, or social previews.

🔹 Layout and Spacing

If your site looks “off,” it’s usually spacing. Use more padding than you think: don’t cram too much into one screen. Let your content breathe 😮‍💨

White space is your friend. So are grids. Most themes and builders already use them — just don’t break them unless you know what you’re doing.

Once you’ve got your fonts, colors, and layout dialed in — you’re finally ready to hit publish.

Up next: let’s launch this thing — and hook it up to the rest of the internet.

Step 4: Publish, Connect, Promote

Fantastic — your content is in, your design looks good, and you’re seconds away from showing your new website to the world ✨

Here’s what to do next to actually launch and make your site findable (by humans, Google, AI – the whole lot).

🔹 Hook Up a Custom Domain

No one wants to type something like yourname.weebly.com or brandname.framer.website

Get a real domain like yourdomain.com — it’s cheap, it’s easy, and it instantly makes you look more legit.

You can:

  • Buy a domain via your site builder (Wix, Squarespace, etc. offer this directly)
  • Or use a registrar like Namecheap and connect it manually

💡 Try to get .com if available, but other extensions like .co, .io, or .site are also great (and often less crowded). You can also use your country domain if your project is strictily local.

🔹 Add Basic SEO Info

Search Engine Optimization (SEO) sounds scary and daunting — but the basics are simple.

Just make sure every page has:

  • A unique title (this shows up in browser tabs and Google search)
  • A short description (helps people know what your page is about)
  • Readable URLs (e.g. /contact instead of /page?id=43721)

If you’re using WordPress, install a plugin like All-in-One SEO or Rank Math. Most builders also have built-in SEO fields — use them!

🔹 Submit to Google

To make sure Google knows your website exists, do this:

  1. Go to the Google Search Console and add your new website’s domain.
  2. Verify domain ownership by adding a domain record in your domain provider’s dashboard (Google offers super detailed instructions on how to do that).
  3. Submit your sitemap in the console – most platforms generate one automatically, and Google will eventually find it, but it will make things much faster if you point it where to look :)

This simple setup speeds up your appearance in search results — and lets you monitor traffic over time.

🔹 Set Up Analytics

If you want to know how many people visit your site and what they do (and you should!) – install some analytics.

There are multiple options available, starting with the status-quo Google platform, all the way to privacy-first alternatives:

Most tools just require a single code snippet. If you’re using WordPress, install a plugin — if you’re using a builder, look for a “Tracking” or “Analytics” section in the settings.

🔹 Share It

Your site is live — don’t just let it sit there! Share it:

  • Add the link to your social media bios
  • Include it in your email signature
  • Mention it on your LinkedIn or Twitter/X
  • Tell your clients, audience, and friends

If you’re planning to blog or sell stuff, this is also a good time to think about email newsletters and marketing tools — check out our Webmaster Academy for detailed guides.

Next up: if you’re still unsure whether a full website is right for you, or want faster alternatives — we’ve got options for that too.

Still Not Sure? Consider These Alternatives

Let’s say you’ve read this far but still feel unsure. Maybe building a full website feels like too much right now — or maybe you just need a lightweight online presence ASAP.

You’re not alone — and the good news is, there are solid alternatives that can get the job done with minimal effort.

Here are a few to consider:

  • Instagram – perfect for visual creatives, artists, photographers, makers. Use it as your portfolio and contact hub.
  • Linktree / Beacons / Carrd – great for quick “link in bio” landing pages. Add your links, a short bio, and you’re set.
  • Medium / Substack – want to write but don’t want to build a site? These platforms handle everything — you just focus on the words.
  • Gumroad / Lemon Squeezy – if all you need is a simple storefront to sell a digital product, you don’t need a full website at all.
  • Typedream / Framer – ultra-fast and modern one-pagers for landing pages, MVPs, or personal projects.

💡 Start where it’s easiest. You can always upgrade to a full website later — and when you do, many platforms even let you redirect or integrate with what you already built.

Owning a website is powerful — but starting small is often the smartest way to go. What matters most is that you have something online that speaks for you when you’re not in the room.

Next up: still have questions? Let’s cover the most common ones before we wrap.

FAQ: Website Creation in 2025

Have questions? You’re not alone. Here are the most common ones we get — along with a few myths that need to be put to rest 👇

🙋🏽‍♀️ Do I need to know how to code to build a website?

Absolutely not. In fact, if you’re coding your site from scratch in 2025, you’re either a developer, a masochist, or both. Builders like Wix, WordPress, and Framer let you create beautiful sites without touching a single line of HTML.

🙋🏻‍♂️ How much does a website cost?

You can get a basic site up and running for under $50/year if you use WordPress with budget hosting. Builders like Wix or Squarespace usually start around $10–20/month. Premium features, domains, and email tools might cost extra — but there’s something for every budget.

🙋🏿‍♂️ Can I build a website for free?

Technically, yes — but it often comes with trade-offs: ads, branding, and no custom domain. It’s fine for testing or prototypes, but not great if you care about first impressions. Spend the $10/year on a domain — it’s worth it.

🙋🏽 Will having a website help me rank on Google?

Only if it’s set up properly — with useful content, clean structure, and some basic SEO. Google won’t magically love you just because you exist. That said, without your own site you’ll never show up in search at all.

🙋🏾‍♀️ Is WordPress still relevant in 2025?

Very much so. It powers over 40% of all websites online. Yes, there are trendier tools, but WordPress is still the best choice if you want flexibility, content-heavy architecture, or advanced features — without paying platform fees.

🙋‍♀️ Can I switch platforms later?

Kind of. You can always rebuild your site elsewhere, but migrating content and design isn’t always smooth — especially with closed builders like Wix or Squarespace. If you think you’ll outgrow your current tool, go with WordPress or a portable builder like Framer.

🙋 Isn’t “just having social media” enough?

Sometimes, yes — especially early on. But a website is the one place online where you make the rules. No algorithms, no ads, no shadowbans. It’s your digital home base.

🙋🏾‍♀️ I saw someone say a website takes weeks to build…

Only if you’re making the next Airbnb. For most people, your first website can be built in a few hours. Don’t let perfectionism slow you down — it’s better to launch something simple and improve it later.

Over to You

Congratulations, you made it! 🎉

We’ve covered a lot — from deciding if you even need a website, to picking the right tool, structuring your content, designing it, launching it, and exploring alternatives.

Now comes the fun part: putting it into action.

Remember, your first website doesn’t need to be ideal. It just needs to exist. Done is better than perfect — especially when perfect never ships.

Whether you end up using WordPress, Wix, Framer, or something else entirely, the most important step is the one you take today.

If this guide helped you out — or you’ve got a question, comment, or a 🌶️ spicy opinion — scroll down to the comments section and drop me a line. We do read them.

And if you found this useful, feel free to share it with a friend or fellow builder.

See you on the internet 👋