
When you’re making changes to your website it’s best to disable it, so you don’t leave visitors with a bad impression. But how do you make sure they don’t just assume your site is permanently down or the URL is wrong?
That’s where WordPress maintenance mode comes in handy! 🚧
Maintenance mode (aka “under construction” mode) restricts your website from being viewed by other people by displaying a maintenance notice and you get to modify your website in peace.
How do you go about properly putting your website into maintenance mode? In this tutorial, you will learn the nifty details about along with the easiest ways to enable maintenance mode.
So What Exactly Is Maintenance Mode in WordPress?
Before we go straight to the methods, you must be wondering how does maintenance mode work?
As you’re modifying your site, chances are you’ll be going through some trial and error. Your website could crash, break completely or slow down.
Either way, it’s not a pleasant sight for your visitors. Not to mention, it may result in a bad impression for your brand and an increased bounce rate, resulting in lower SEO rank.
To avoid that, WordPress maintenance mode lets you display a custom notice whenever your website is in maintenance. You can let your visitors know what’s going on, and where to reach you in the meantime.
Sure, you can also make your site private by password protecting it for the time being. However, search engines can’t crawl password-protected pages, so your SEO ranking may suffer if you do this for a long period of time.
That’s why enabling WordPress maintenance mode is arguably your safest bet. It lets both your visitors and search engines know that your website is just temporarily unavailable.
***
Now, that you know the benefits of WordPress maintenance mode, it’s time to try and activate it yourself! There are two ways you can go about this: manually, or with plugins.
Enabling Maintenance Mode with Plugins
Creating and enabling maintenance/under-construction mode on your WordPress site through a plugin is undeniably the most convenient option. Here are two of the best plugins options to do that:
This plugin comes with a free version, and a premium one with a $29.60/year starting price. To begin designing your maintenance page with this plugin you need to:
- Login to your WordPress dashboard, go to Plugins, then Add New and install and activate the Coming Soon Page & Maintenance Mode by SeedProd plugin.
- Once activated, head to Installed Plugins in your WordPress admin menu, and locate the plugin, then click on Settings.
- Scroll down and choose the Enable Maintenance Mode option under General. You can also modify your page and header settings on the same page.
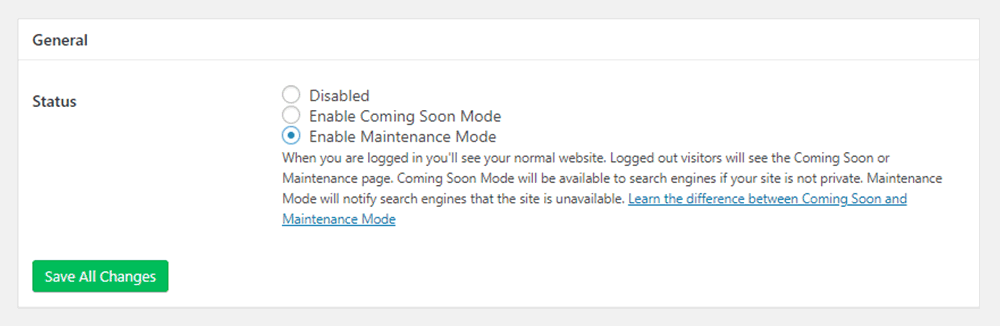
Next, switch to Design and make changes as you wish. Preview your creation as you’re working on the maintenance page by using the Live Preview option before saving all changes.
WP Maintenance Mode: if you want something simple and effective, the plugin made by Designmodo is for you. This free plugin comes with a default theme you can modify fully, from its background to its messages.
It also comes with a selection of great modules you can display on your sites like a countdown, a subscription form, a social network link, and implement Google Analytics. What’s more, it also works great with any WordPress theme.
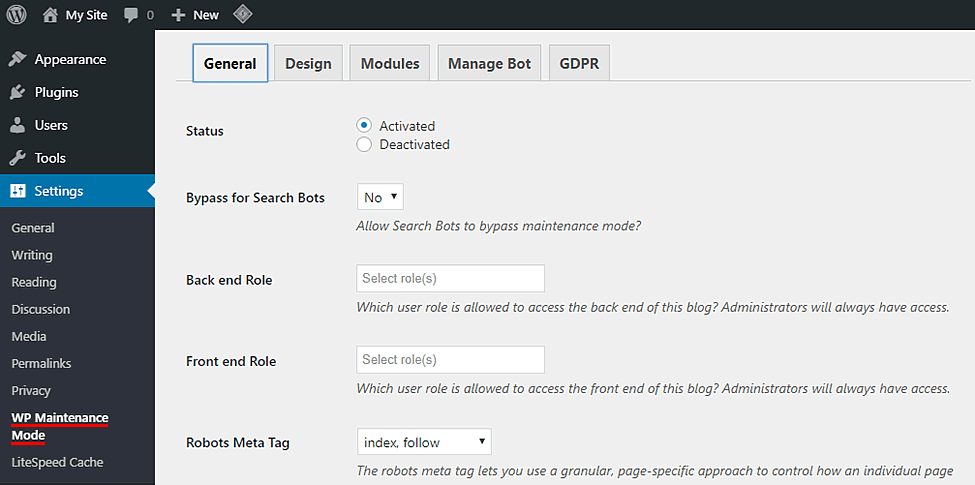
To use this plugin, simply install and activate it from your WordPress dashboard and head to WP Maintenance Mode under Settings to tweak around the design and configurations.
Enabling Maintenance Mode Manually
If you prefer to do things by hand, you can easily enable maintenance mode by editing your .htaccess or functions.php files. Let’s take a closer look under the hood, shall we:
Manual option #1: Adding a Code Snippet to functions.php This can be done directly through your WordPress admin area:
- Login to your dashboard and navigate to Appearances > Themes Editor.
- Next, locate the Theme Functions (
functions.php) file on the right menu bar. - Copy and paste the following code snippet to the very bottom of the file, but before the closing
?>tag if there’s any:
// Activate WordPress Maintenance Mode
function wp_maintenance_mode() {
if (!current_user_can('edit_themes') || !is_user_logged_in()) {
wp_die( "<h1>Under Maintenance</h1><br>Website under planned maintenance. Please check back later." );
}
}
add_action( 'get_header', 'wp_maintenance_mode' );
That’s it! All you need to do next is modify the messages and click Update File.
Important: always make it a habit to have a back up of your website before making any changes, and to make changes through child themes to avoid any errors and permanent data loss.
***
Manual option #2: Editing the .htaccess File You can also manually set up a custom maintenance page and redirect your site’s homepage to it by editing your .htaccess file. This can be done through the File Manager of your hosting account or a free FTP client like FileZilla.
Let’s look closer at how you can add the necessary edits via a File Manager:
- Access the File Manager of your hosting provider to open your website’s root directory.
- Locate your .htaccess file and right-click to Rename it. Here we’re using .htaccess_default as an example.
-
Create a new .htaccess file, then add the following lines to it. Change the example.com to your domain name.
RewriteEngine On RewriteBase / RewriteCond %{REQUEST_URI} !^/maintenance\.html$ RewriteRule ^(.*)$ https://example.com/maintenance.html [R=307,L] - Now, create a new
maintance.htmlfile with your message in it. If you’re not sure how to do it, simply use a free maintance.html template like this one. - Copy-paste the code to the maintenance.html file, then make changes as needed.
And that’s it! When you access your website, a maintenance page should appear instead of your usual homepage. To exit maintenance mode simply restore the original .htaccess file.
Note: The first step above is a must if you don’t want to break anything on your website when you reactivate it.
Final Words
In this tutorial, you’ve learned several simple ways to put your WordPress site into maintenance mode. Here’s a quick recap of what we’ve been talking about:
- Enable and design your own WordPress maintenance page with the Coming Soon Page by SeedProd.
- Activate maintenance mode through the WP Maintenance Mode plugin.
- Enable and create a maintenance page manually by editing the .htaccess file through a File Manager.
- Add code to the
functions.phpfile to enable the default WordPress maintenance mode message.
After you complete the steps provided above, you’ll be able to make changes on your website without inconveniencing your audience. No more fear of losing website visitors and SEO rankings!